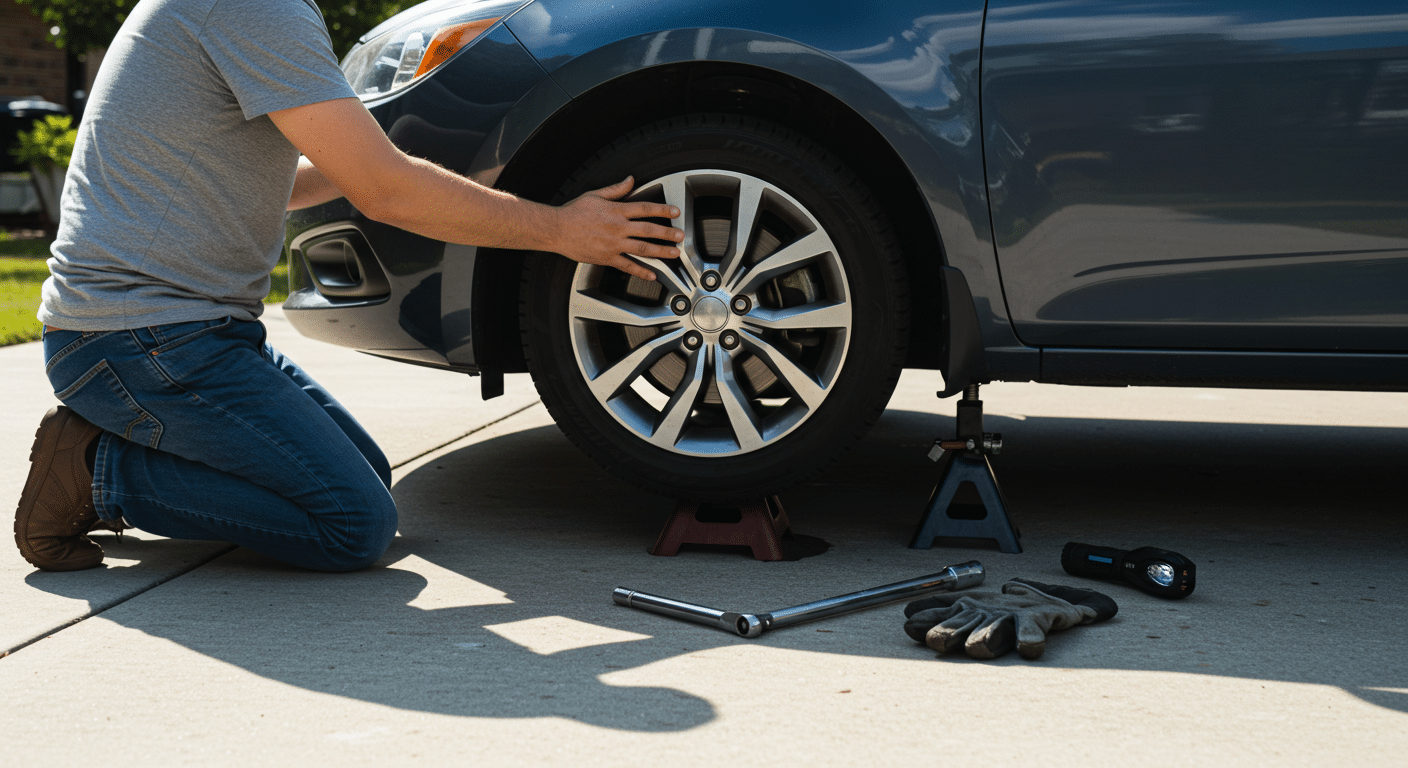
When that telltale squealing or grinding sound starts coming from your wheels, you know it's time to address your vehicle's braking system. Brake maintenance isn't just about preserving your car's performance; it's critical for your safety on the road. But for many drivers, the uncertainty around brake replacement costs can lead to procrastination or overpaying.
The cost to replace brake pads and rotors can vary significantly based on several factors, including vehicle type, parts quality, and where you get the service performed. At Blue Ridge Automotive – European & Domestic, we've seen firsthand how understanding these variables can help drivers budget appropriately and avoid unnecessary expenses.
In this comprehensive guide, we'll break down everything you need to know about brake replacement costs, help you identify when replacement is necessary, and provide tips for getting the best value without compromising your safety.
Know What You're Paying For: Key Brake Components Explained
Before diving into costs, it's important to understand what you're paying for. Your vehicle's braking system consists of several crucial components that work together to stop your car safely.
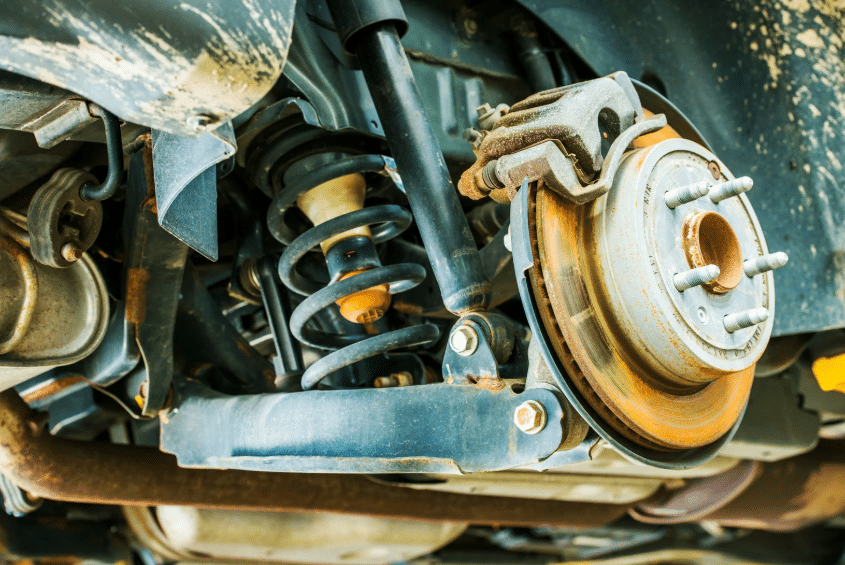
Brake pads are the friction material that presses against the rotors to slow your vehicle. Made of composite materials designed to withstand heat and pressure, these components naturally wear down over time. Most vehicles use different types of brake pads. Whether semi-metallic, ceramic, or organic, each pad has varying price points and performance characteristics.
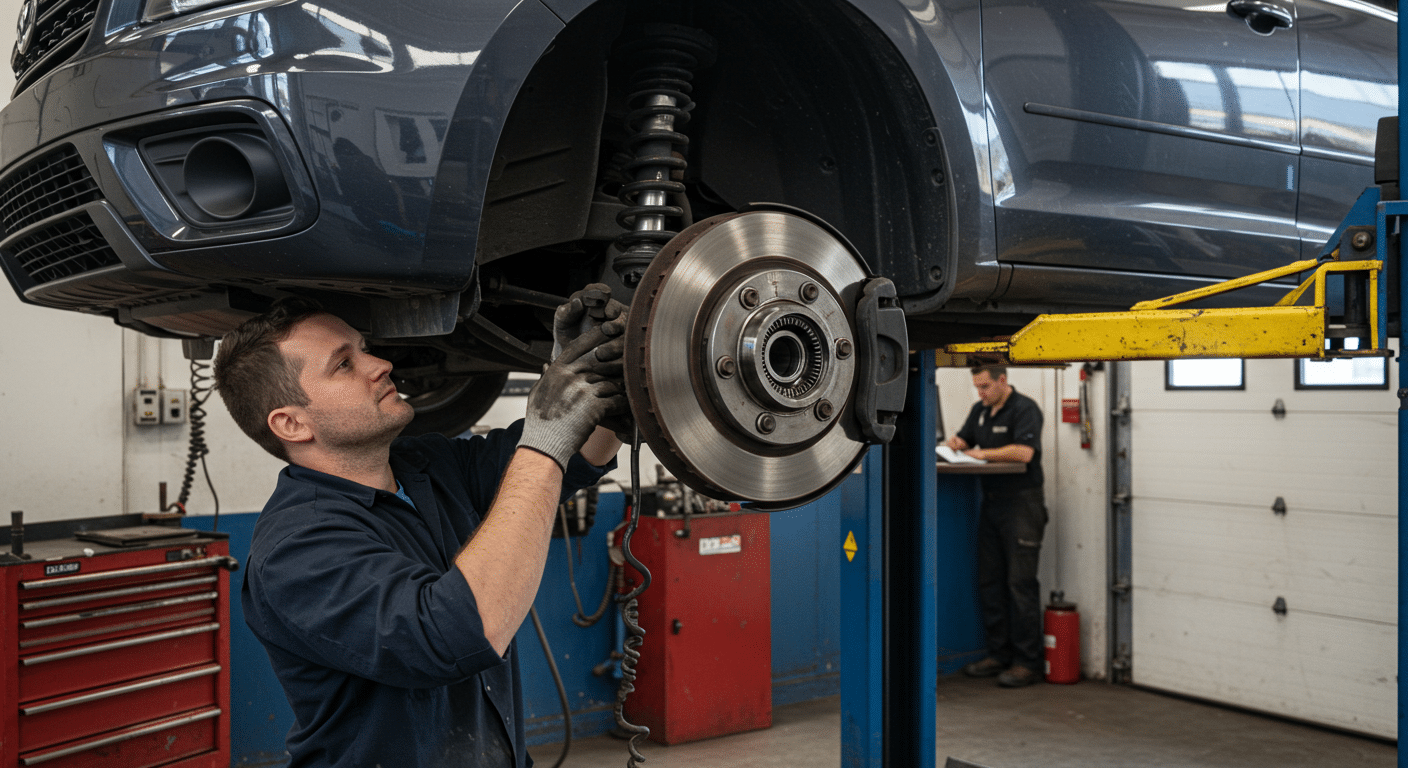
Rotors (also called brake discs) are the metal discs attached to your wheels that the brake pads clamp onto when you press the brake pedal. These can become warped or worn over time, reducing braking efficiency and safety. Unlike pads, rotors are typically made of cast iron or carbon-ceramic material for high-performance vehicles.
Calipers are the components that house the brake pads and push them against the rotors when you press the brake pedal. While calipers generally last longer than pads and rotors, they can occasionally need replacement or rebuilding.
According to industry data from 2024, most drivers replace their brake pads every 30,000 to 70,000 miles, while rotors typically last for 50,000 to 70,000 miles, depending on driving habits and conditions. At Blue Ridge Automotive – European & Domestic, our technicians can perform a comprehensive brake inspection to determine exactly which components need attention.
Plan Your Budget: What Brake Pad and Rotor Replacement Really Costs
The cost of replacing brake pads and rotors can vary widely depending on several factors, but understanding average price ranges can help you budget appropriately.
For standard brake pad replacement alone, most drivers can expect to pay between $250 and $350 per axle. This typically includes the parts and labor for replacing just the brake pads on either the front or rear wheels.
When replacing both brake pads and rotors, the cost increases significantly. On average, expect to pay between $500 and $800 per axle for parts and labor. This higher price reflects the additional cost of the rotors themselves and the extra labor required.
Here's a more detailed breakdown of what contributes to these costs:
- Part Costs: Brake pads range from $75 to $125 per set, depending on quality, while rotors typically cost between $75 and $175 each.
- Labor Costs: Professional installation typically runs between $125 and $175 per hour, with a complete brake job taking 1-3 hours, depending on the vehicle.
Premium or performance vehicles like Mercedes, BMW, or Audi will typically fall at the higher end of these ranges or even exceed them, with some luxury brake jobs costing $1,000 or more per axle.
Understand What Drives Brake Service Pricing
Several key factors can significantly impact how much you'll pay for brake service:
Vehicle Make and Model
The type of vehicle you drive is perhaps the biggest cost determinant. Economy cars typically have the most affordable brake components, while luxury and performance vehicles require specialized, more expensive parts. For example, replacing brake pads and rotors on a Honda Civic might cost $450-600 for the front axle, while the same service on a BMW 5-series could easily exceed $800.
Truck and SUV owners should also expect higher costs due to the larger, heavier-duty components required for these vehicles. These larger vehicles put more strain on braking systems, requiring more robust parts that come with higher price tags.
Quality of Replacement Parts
Brake components come in various quality levels, from economy to premium and performance grades:
- Economy/standard parts typically cost 30-50% less than premium options, but may wear out faster
- OEM (Original Equipment Manufacturer) parts match what came with your vehicle from the factory
- Premium aftermarket parts often offer improved performance or longevity
- Performance or specialty parts designed for specific conditions can cost significantly more
According to a 2024 industry survey, premium brake pads last approximately 25% longer than economy options, potentially offering better value despite the higher initial cost.
Service Location
Where you get your brake work done significantly impacts your total cost:
- Dealerships typically charge the highest rates, often 20-40% more than independent shops
- Independent repair shops usually offer more competitive pricing with comparable quality
- Chain repair facilities may offer promotions, but sometimes use lower-quality parts
- DIY replacement saves on labor but requires tools and expertise
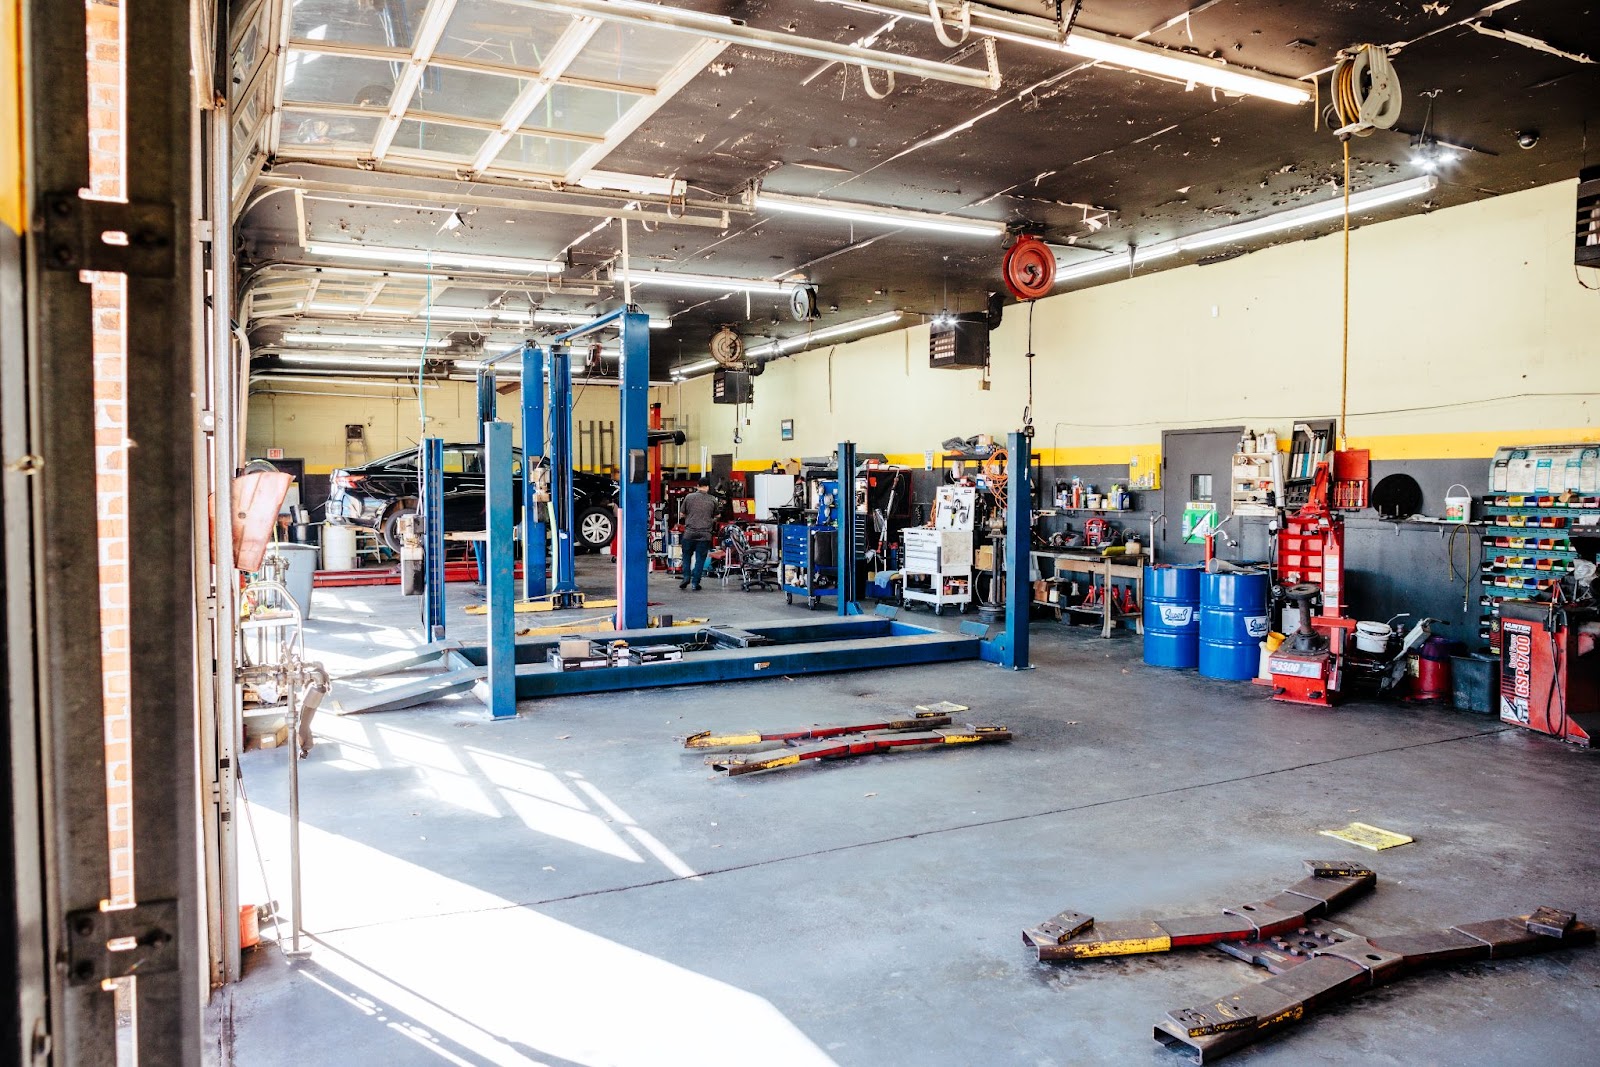
At Blue Ridge Automotive – European & Domestic, we provide competitive pricing while using high-quality parts and employing ASE-certified technicians who specialize in brake systems.
Spot the Warning Signs Before Brake Problems Worsen

Knowing when to replace your brakes can save you money and prevent dangerous failures. Here are the telltale signs that your braking system needs attention:
Audible Warning Signs
That high-pitched squealing when you apply the brakes isn't just annoying, it's a deliberate design feature. Most brake pads include wear indicators that create a squealing noise when the pad material has worn down to a certain level.
If ignored, this squealing eventually transitions to a harsh grinding sound, indicating metal-on-metal contact that's damaging your rotors. Other concerning sounds include clicking, rattling, or vibrating noises when braking, which could indicate loose components or unevenly worn pads and rotors.
Physical and Performance Indicators
Beyond sound, your vehicle provides several other indicators of brake system issues:
- Vibration or pulsation in the brake pedal often indicates warped rotors
- Longer stopping distances suggest reduced braking efficiency
- A brake pedal that feels "soft" or sinks to the floor may indicate hydraulic problems
- Pulling to one side during braking suggests uneven wear or a stuck caliper
- Visual inspection shows less than 1/4 inch of pad material remaining
According to the National Highway Traffic Safety Administration (NHTSA), brake-related problems contribute to approximately 22% of vehicle crashes caused by mechanical failure. Regular inspection and timely replacement are crucial safety measures.
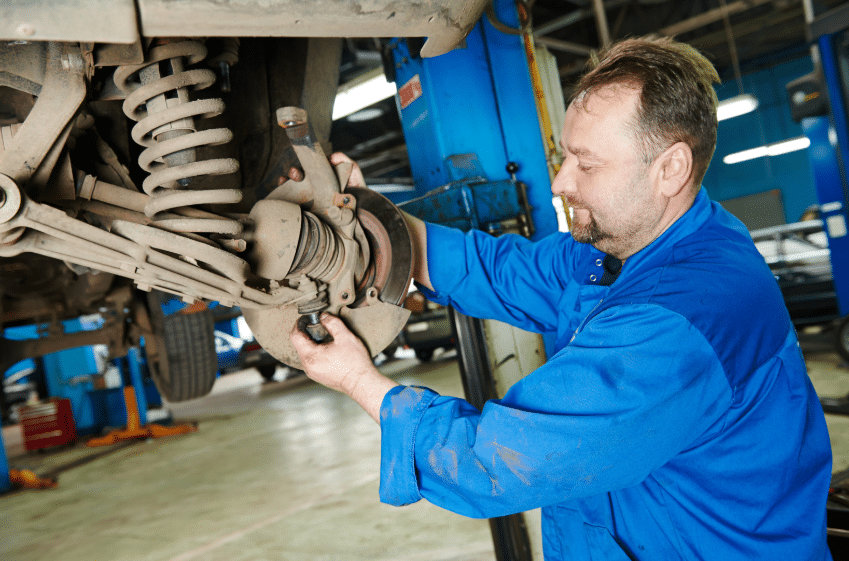
For a professional brake inspection to identify potential issues before they become safety hazards, our certified technicians can provide a comprehensive evaluation.
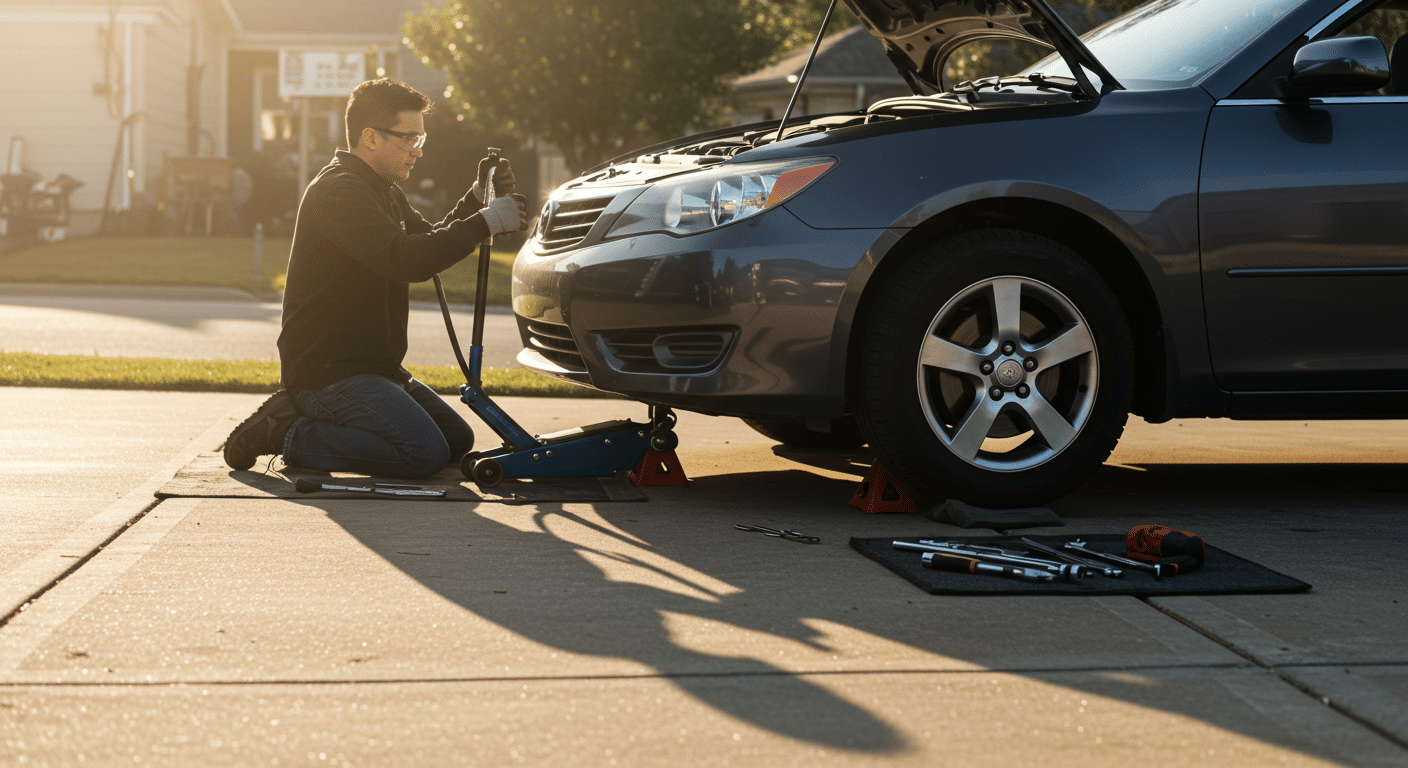
Choose the Right Approach Between DIY vs. Pro Brake Replacement
Many car enthusiasts consider brake replacement a manageable DIY project, while others prefer leaving it to professionals. Each approach has distinct advantages and considerations.
DIY Brake Replacement
Taking the DIY approach can save you $150-300 in labor costs per axle. However, you'll need:
- Basic mechanical tools including jack stands, lug wrench, C-clamp, and socket set
- A safe workspace with solid, level ground
- Technical knowledge or the ability to follow detailed instructions
- 2-4 hours per axle for first-timers
The potential savings are significant, but the learning curve can be steep. A 2024 survey of DIY mechanics found that first-time brake jobs took an average of 3.5 hours per axle, compared to 1 hour for professionals.
Professional Brake Service Benefits
Having your brakes professionally replaced offers several advantages:
- Technician expertise and specialized tools ensure proper installation
- Additional inspection of related components that might need attention
- Labor warranties (typically 12-24 months) protect against installation issues
- Professional shops can properly dispose of old parts and hazardous materials
- Most shops can complete the job in 1-2 hours per axle
"We had a customer who attempted a DIY brake job and accidentally damaged an ABS sensor, turning a $500 brake job into a $900 repair," shares a service manager at Blue Ridge Automotive – European & Domestic. "While DIY is tempting, safety-critical systems sometimes warrant professional attention."
Smart Ways to Cut Brake Replacement Costs Without Risking Safety
While brake replacement is a necessary expense, there are legitimate ways to reduce costs without compromising safety:
Compare Quotes and Options
Don't settle for the first estimate you receive. Getting quotes from 3-4 reputable shops can reveal significant price differences for the same service. When comparing, make sure you understand:
- What quality level of parts are they using
- Whether they're replacing both pads and rotors or just pads
- If the price includes additional services like caliper rebuilding or brake fluid flush
- What warranty is offered on parts and labor
Consider Partial Replacement When Appropriate
In some cases, you may not need to replace everything:
- Brake pads wear out faster than rotors; sometimes you can replace just the pads
- Front brakes typically wear 2-3 times faster than rear brakes due to weight distribution
- Some rotors can be "turned" (resurfaced) rather than replaced if they have adequate thickness
However, if rotors show signs of heat damage, cracks, or excessive wear, replacement is the safer option. A professional inspection can determine whether partial replacement is appropriate for your vehicle.
Timing and Maintenance Considerations
Regular maintenance can extend the life of your braking system:
- Address squealing or performance issues promptly before they cause rotor damage
- Consider brake service during other major maintenance for potential labor savings
- Follow manufacturer-recommended brake fluid replacement (typically every 2-3 years)
- Adjust driving habits to reduce brake wear (avoiding "riding" the brakes, harsh stops)
According to a 2024 maintenance study, drivers who respond promptly to the first signs of brake wear spent an average of 30% less on brake maintenance over their vehicle's lifetime compared to those who delayed service.
For comprehensive brake services that include thorough inspection and maintenance recommendations, our experts can help extend the life of your braking system while keeping you safe.
Get More from Your Brake Service with the Right Warranty

Not all brake jobs are created equal, and understanding warranty coverage can help you determine the true value of the service you're receiving.
Most quality brake components come with a manufacturer's warranty covering defects for a specific period, typically 12 to 36 months. However, these warranties usually cover only the parts themselves, not labor for replacement.
Shop-provided labor warranties vary widely, from as little as 90 days to "lifetime" coverage. When comparing quotes, consider the total warranty package. A slightly higher initial cost might provide significantly better warranty coverage, ultimately delivering better value.
When evaluating brake service providers, ask these specific warranty questions:
- What's covered under the parts warranty: just defects, or also normal wear?
- How long is the labor warranty if problems arise from installation?
- Are there mileage limitations on the warranty?
- What documentation is needed if warranty service is required?
Remember that proper maintenance also affects warranty coverage. Most warranties require reasonable care and maintenance of your vehicle to remain valid.
Frequently Asked Questions
How often do brake pads and rotors need to be replaced?
Brake pads typically need replacement every 30,000 to 70,000 miles, depending on your driving habits, vehicle type, and brake pad quality. Aggressive driving in stop-and-go traffic will wear pads faster than highway cruising.
Rotors generally last longer, often 50,000 to 70,000 miles, but can sometimes need replacement along with pads if they've become too thin, warped, or damaged. Regular inspections during oil changes can help catch wear before it becomes a safety issue.
Can I replace just the brake pads without replacing the rotors?
Yes, in many cases, you can replace just the brake pads if your rotors are still in good condition with adequate thickness remaining. However, if rotors show signs of scoring, grooving, or have excessive runout (wobble), they should be replaced simultaneously.
Some mechanics recommend at least resurfacing rotors when installing new pads to ensure proper contact and performance. This decision should be based on rotor measurements and visual inspection by a qualified technician.
What's the difference between economy and premium brake components?
Economy brake components typically use less expensive materials that may wear faster or provide less optimal braking performance. Premium brake components often feature higher-quality friction materials, better heat dissipation, and more precise manufacturing tolerances.
Premium pads might include features like chamfered edges to reduce noise and shims to prevent vibration. While premium components cost more initially, they often provide better value through longer service life, improved stopping power, and quieter operation, especially important for heavier vehicles or those used for towing.
How long does a brake replacement service take?
A professional brake replacement typically takes 1-2 hours per axle (front or rear) when performed by experienced technicians with proper equipment. This includes removing wheels, replacing components, and testing.
DIY replacements usually take considerably longer, about 2-4 hours per axle for someone with moderate mechanical experience, and potentially longer for first-timers. Complete brake jobs involving all four wheels, fluid flush, and other related services might require 3-5 hours total at a professional shop.
Will my car insurance cover brake replacement?
Standard auto insurance policies do not cover maintenance items like brake replacement, as these are considered expected wear components. Insurance only covers brake damage resulting from a covered accident.
Extended warranties or vehicle service contracts might cover brake components if failure occurs due to defects rather than normal wear, but most exclude wear items like brake pads. It's best to budget for brake maintenance as a regular ownership expense, similar to tires or oil changes.
Stay Safe and Informed with Smart Brake Maintenance Decisions
Replacing brake pads and rotors represents a significant but necessary investment in your vehicle's safety and performance. While costs typically range from $300-700 per axle for parts and labor, understanding the factors that influence pricing empowers you to make informed decisions.
By recognizing the signs of brake wear early, comparing service options carefully, and considering the total value, including warranty coverage, you can manage costs effectively without compromising safety. Remember that brakes are perhaps your vehicle's most critical safety system.
Investing in quality components and professional installation provides safety that far outweighs the potential savings of cutting corners. If you're experiencing any brake issues or approaching the typical replacement interval, contact a reputable service provider for an inspection and detailed estimate tailored to your specific vehicle.
About Blue Ridge Automotive – European & Domestic
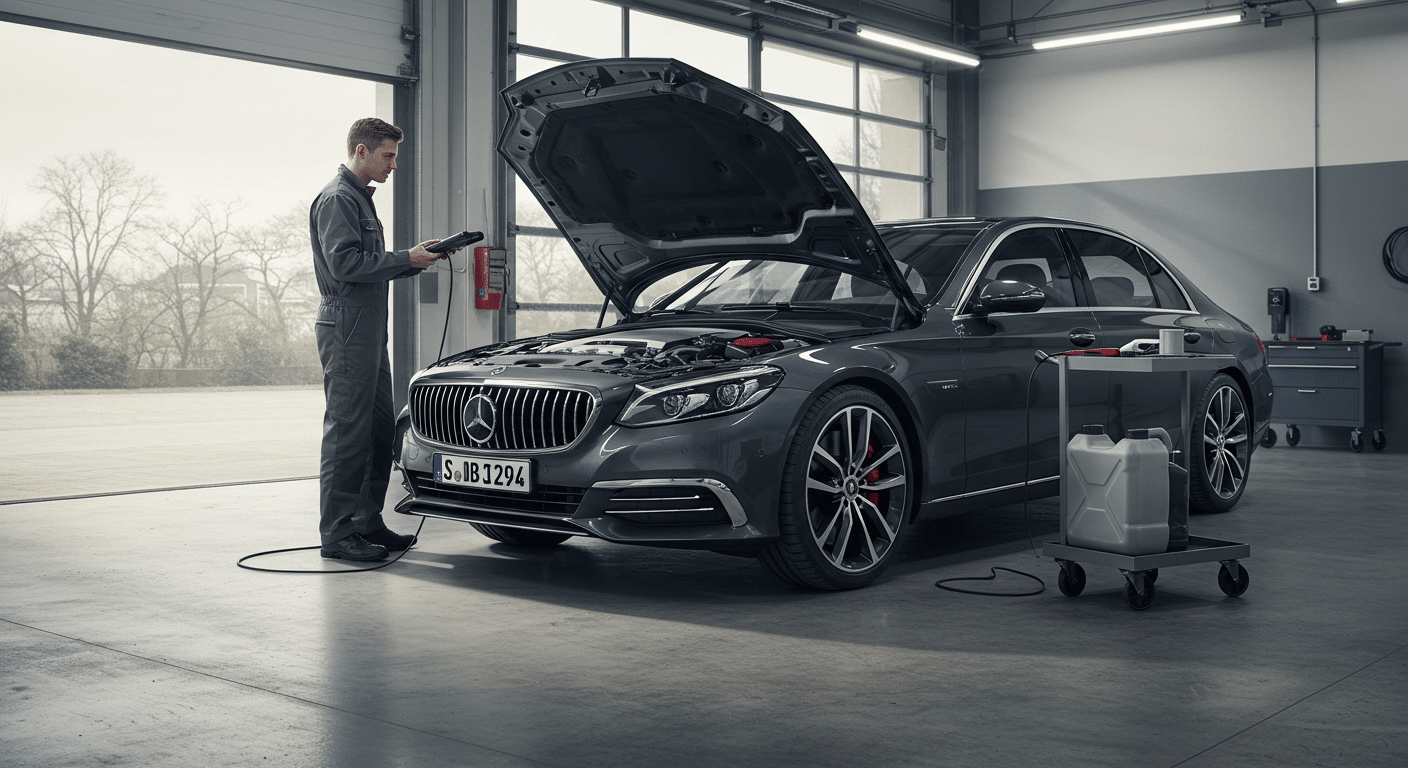
Blue Ridge Automotive – European & Domestic offers full-service auto repair and maintenance, backed by over 25 years of experience in the Atlanta area. Our ASE-certified technicians specialize in brake system diagnostics, repairs, and replacements for all makes and models. Services include pad and rotor replacement, caliper repair, brake fluid service, and ABS diagnostics.
We stay current on braking technologies, from traditional systems to those in hybrid and electric vehicles, through ongoing technician training. Our shop uses OEM or premium aftermarket parts and backs all work with strong warranties. With advanced diagnostic tools, we catch brake issues early before they impact your safety.
Contact our team to schedule a full brake inspection and explore service options tailored to your vehicle. We’ve helped thousands of Atlanta drivers stay safe with reliable brake service that fits their needs and budget.
Maintaining your vehicle's transmission is essential for its longevity and performance. While many car owners understand the importance of regular oil changes, transmission fluid often gets overlooked until problems arise. Regular transmission fluid changes can extend your vehicle's life and help avoid costly repairs down the road.
The fluid lubricates, cools, and cleans the transmission components, ensuring smooth gear shifts and optimal performance. At Blue Ridge Automotive – European & Domestic, we recommend transmission fluid changes as part of your regular maintenance schedule, but we also understand that some car enthusiasts prefer handling maintenance tasks themselves.
This guide provides step-by-step instructions for both automatic and manual transmission fluid changes, including the tools you'll need, safety precautions, and tips for ensuring the job is done correctly. Whether you're a seasoned DIY mechanic or trying your hand at car maintenance for the first time, these instructions will help you complete the task with confidence.
Protect Your Transmission by Understanding Fluid Function
Transmission fluid serves several critical functions in your vehicle. For automatic transmissions, the fluid acts as a hydraulic medium to transfer power from the engine to the transmission. In manual transmissions, it primarily serves as a lubricant for the gears and synchronizers.
Over time, transmission fluid breaks down and becomes contaminated with metal particles, friction material, and other debris. This degradation can lead to:
- Rough or delayed shifting
- Transmission overheating
- Premature wear of internal components
- Complete transmission failure in severe cases
Different vehicles require specific types of transmission fluid. Using the wrong type can cause serious damage to your transmission. Always consult your owner's manual or a trusted mechanic to determine the correct fluid for your vehicle.
The frequency of transmission fluid changes varies depending on your driving habits, vehicle make, and model. As a general rule, automatic transmission fluid should be changed every 30,000 to 60,000 miles, while manual transmission fluid typically lasts 30,000 to 90,000 miles. However, if you frequently tow heavy loads or drive in severe conditions, more frequent changes may be necessary.
Gather Essential Tools and Materials Before You Start
Before beginning your transmission fluid change, gather all necessary tools and materials. Proper preparation will ensure the job goes smoothly and safely. Here's what you'll need:
For automatic transmissions:
- Transmission fluid (specific to your vehicle)
- Transmission filter kit (if applicable)
- Transmission pan gasket (if changing the filter)
- Drain pan (minimum 5-quart capacity)
- Jack and jack stands or vehicle ramps
- Socket set and wrenches
- Torque wrench
- Funnel
- Shop rags
- Gloves and safety glasses
For manual transmissions:
- Manual transmission fluid (specific to your vehicle)
- Drain pan
- Socket set and wrenches
- Funnel with a flexible hose attachment
- Shop rags
- Gloves and safety glasses
Additionally, you might need a fluid pump for refilling certain transmissions, particularly those without dipsticks or with fill plugs in tight locations. Some modern vehicles require special tools for accessing the transmission, so research your specific model before starting.
Quality tools make a difference in how smoothly this job goes. If you're unsure about your vehicle's specific requirements, our team at Blue Ridge Automotive – European & Domestic can guide the correct fluid type and quantity for your particular make and model.
Follow These Safety Tips Before You Begin
Safety should always be your primary concern when working on any vehicle maintenance task. Follow these critical safety measures before beginning your transmission fluid change:
Ensure the vehicle is completely cool before starting. Transmission fluid can reach temperatures of 175°F or higher during normal operation and can cause severe burns if touched.
Park on a flat, level surface and engage the parking brake. For additional security, place wheel chocks behind the rear tires if working at the front of the vehicle, or in front of the front tires if working at the rear.
If using a jack, make sure to place jack stands securely under appropriate jacking points. Never rely solely on a hydraulic jack to support your vehicle while working underneath it.
Wear appropriate personal protective equipment, including:
- Safety glasses to protect your eyes from fluid splashes
- Gloves to protect your hands from hot components and chemicals
- Long sleeves to protect your arms from potential burns or cuts
Have a plan for the proper disposal of used transmission fluid. Used automotive fluids are hazardous waste and should never be poured down drains or onto the ground. Most auto parts stores and service centers, including our brake service center, accept used fluids for recycling.
Keep a fire extinguisher nearby as a precaution, and ensure your work area is well-ventilated to avoid breathing in fumes.
Perform a Fluid Change for Automatic Transmissions
Changing the fluid in an automatic transmission involves draining the old fluid, replacing the filter (if applicable), and refilling with fresh fluid. Follow these steps carefully:
Preparation and Draining
- Run the engine until it reaches normal operating temperature, which helps the fluid drain more completely.
- Turn off the engine, then raise and secure the vehicle using ramps or jack stands.
- Locate the transmission pan underneath your vehicle. It's typically rectangular or square-shaped with multiple bolts around its perimeter.
- Position your drain pan beneath the transmission pan.
- Loosen the pan bolts gradually in a cross pattern, leaving a few bolts slightly threaded on opposite sides.
- As you loosen the final bolts, the fluid will begin to seep out. Be careful; the pan may be full of fluid, so maintain pressure against it to control the flow.
- Carefully remove the transmission pan completely, allowing the remaining fluid to drain into your catch pan.
Filter Replacement and Cleaning
- Locate the transmission filter inside the transmission. It's usually attached to the valve body with bolts or clips.
- Remove the old filter and note its orientation for installing the new one.
- Clean the transmission pan thoroughly using solvent or brake cleaner, removing all metal particles and debris.
- Inspect the pan for damage, particularly the gasket sealing surface.
- Install the new filter according to the manufacturer's instructions, ensuring it's properly seated.
- Place the new gasket on the clean pan, using a small amount of gasket sealer at the corners if recommended by your vehicle manufacturer.
Reinstallation and Refilling
- Carefully position the pan with its new gasket against the transmission housing.
- Hand-thread all bolts first, then tighten in a cross pattern to the manufacturer's specifications using a torque wrench.
- Lower the vehicle if necessary to access the fill tube.
- Remove the transmission dipstick and insert a funnel.
- Add the new fluid gradually, checking the level frequently to avoid overfilling.
- Start the engine and let it run for a few minutes with the transmission in Park.
- Shift through all gears with your foot on the brake, then return to Park.
- Check the fluid level again, adding more if necessary.
The exact amount of fluid needed varies by vehicle, but typically ranges from 4 to 16 quarts for a complete change. Consult your owner's manual for the precise specification. Remember that overfilling can be just as harmful as underfilling.
Change Manual Transmission Fluid the Right Way
Manual transmission fluid changes are typically simpler than automatic ones, as they usually don't involve filter replacement. Here's how to perform this maintenance task:
Draining the Old Fluid
- Ensure the vehicle is completely cool before beginning.
- Raise and secure the vehicle using ramps or jack stands.
- Locate both the fill plug and drain plug on the transmission case. The fill plug is typically on the side of the transmission, while the drain plug is at the bottom.
- Remove the fill plug first. This is crucial because if you can't remove the fill plug, you won't be able to refill the transmission after draining.
- Once the fill plug is successfully removed, position your drain pan under the drain plug.
- Remove the drain plug and allow all fluid to drain completely.
- Inspect the drained fluid for metal particles, which could indicate transmission wear.
Refilling with Fresh Fluid
- Clean both the drain and fill plugs, and inspect their sealing washers.
- Replace the drain plug and tighten to the specified torque.
- Using a funnel with a flexible hose attachment, add the new fluid through the fill hole.
- Fill until fluid begins to seep out of the fill hole, which indicates the correct fluid level.
- Replace the fill plug and tighten to the specified torque.
- Lower the vehicle and test drive briefly.
- Check for leaks around both plugs.
Manual transmissions typically require between 2 and 4 quarts of fluid, depending on the vehicle. The exact type of fluid varies significantly between makes and models, with some requiring conventional gear oil while others need specialized synchronizer-friendly fluids.
For high-performance vehicles or those with specialized components like those discussed in our turbocharger maintenance guide, specific transmission fluids may be required.
Adapt Your Approach Based on Vehicle Type
Different vehicles have unique transmission designs that may require special procedures during fluid changes. Here are some special considerations to keep in mind:
European Vehicles
Many European vehicles, particularly German brands like BMW, Mercedes-Benz, and Volkswagen, claim to have "lifetime" transmission fluid. However, most independent mechanics recommend changing this fluid every 60,000-80,000 miles. These vehicles often require specialized fluids and may need a professional-grade scanner to complete the procedure properly.
CVT Transmissions
Continuously Variable Transmissions (CVTs) are becoming increasingly common in newer vehicles. These transmissions have unique fluid requirements and often need special procedures for fluid changes. Using incorrect fluid in a CVT can cause catastrophic failure. Some CVTs also require a specific procedure to set the correct fluid level, which may involve checking the temperature with a scanner.
Hybrid Vehicles
Hybrid vehicles typically use specialized transmission fluid and may have unique draining and filling procedures. The high-voltage components in hybrid transmissions make these fluid changes particularly dangerous for DIYers without proper training. Consider consulting a professional for these vehicles.
4WD and AWD Vehicles
Four-wheel drive and all-wheel drive vehicles often have additional components like transfer cases and differentials that require their fluid changes. While performing your transmission fluid change, it's a good opportunity to check and service these components as well.
When in doubt about your specific vehicle's requirements, consult your owner's manual or reach out to a professional technician at Blue Ridge Automotive – European & Domestic for guidance.
Solve Common Problems During Fluid Changes
Even with careful preparation, you might encounter some challenges during a DIY transmission fluid change. Here are solutions to common problems:
If the transmission pan bolts are stuck or stripped, try using penetrating oil and allowing it to soak before attempting removal again. For stripped bolts, a bolt extractor set may be necessary.
For overfilled transmissions, use a fluid transfer pump or a turkey baster to remove excess fluid until the level is correct. An overfilled transmission can cause foaming, pressure buildup, and seal damage.
If you notice metal particles or debris in your old fluid, this could indicate internal transmission wear. Small amounts of metal dust are normal, but large chunks or excessive debris warrant professional inspection before continuing to drive the vehicle.
Should you encounter leaks after completing the fluid change, first check that all plugs and bolts are tightened to specification. If leaking persists, the gasket may need replacement, or there could be an issue with the sealing surface.
For vehicles with no visible dipstick (common in newer models), the fluid level must be checked and filled through a special plug on the transmission case. This often requires the vehicle to be level and the fluid at a specific temperature, usually requiring a scanner to verify.
Know When to Bring in a Transmission Specialist
While changing transmission fluid is a manageable DIY project for many car enthusiasts, certain situations call for professional assistance. Consider consulting a professional mechanic at Blue Ridge Automotive – European & Domestic if:
- Your vehicle has a sealed transmission advertised as "fill-for-life"
- You need to perform a complete transmission flush rather than a simple fluid change
- The manufacturer specifies a complex procedure requiring specialized equipment
- Your transmission is exhibiting symptoms like slipping, harsh shifts, or unusual noises
- You've discovered significant metal particles or debris in your old transmission fluid
- Your vehicle has a CVT or hybrid transmission system
- You're uncomfortable working with any aspect of the procedure
Professional transmission services often include comprehensive diagnostics that can identify potential issues before they become major problems. If you're uncertain about taking on this maintenance task yourself, check out our blog for more automotive maintenance tips or contact our service department for assistance.
Frequently Asked Questions
How often should I change my transmission fluid?
For automatic transmissions, most manufacturers recommend changing the fluid every 30,000 to 60,000 miles. Manual transmissions typically require fluid changes every 30,000 to 90,000 miles.
However, if you frequently tow heavy loads, drive in mountainous terrain, or experience stop-and-go traffic regularly, consider more frequent changes. Always check your owner's manual for the manufacturer's specific recommendations for your vehicle.
Is it true that changing transmission fluid in older vehicles can cause problems?
There's a common belief that changing transmission fluid in high-mileage vehicles can cause transmission failure. While it's true that in some cases an older transmission might begin slipping after a fluid change, this typically indicates the transmission was already failing.
The fresh fluid has different friction characteristics than the old, contaminated fluid, which can reveal pre-existing issues. If your vehicle has over 100,000 miles and has never had a transmission fluid change, consider consulting with a professional mechanic first.
What's the difference between a transmission fluid change and a transmission flush?
A transmission fluid change involves draining the fluid that sits in the pan (typically 40-50% of the total fluid) and replacing it with fresh fluid. A transmission flush uses specialized equipment to force out virtually all the old fluid from the transmission, including fluid in the torque converter and transmission cooler lines.
While a flush is more comprehensive, a simple fluid change is adequate for regular maintenance and can be performed at home, whereas a flush typically requires professional equipment.
How do I know if my transmission fluid needs changing if there's no dipstick?
Many modern vehicles have sealed transmissions without traditional dipsticks. For these vehicles, check the owner's manual for the recommended service interval. Some signs that indicate your fluid needs are changing include rough shifting, delayed engagement when putting the vehicle in gear, or unusual noises from the transmission.
These vehicles typically have a fill plug on the transmission case that requires special tools to access, and often need the fluid to be at a specific temperature when checking the level.
Can I mix different brands or types of transmission fluid?
It's not recommended to mix different brands or types of transmission fluid unless they specifically meet the same manufacturer specifications. Transmission fluids have unique friction modifiers and additives designed for specific transmissions.
Mixing incompatible fluids can cause shifting problems, accelerated wear, or even transmission failure. Always use the exact type of fluid specified in your owner's manual or by the transmission manufacturer.
Contact Blue Ridge Automotive – European & Domestic for Trusted Transmission Service
Regular transmission fluid changes are a crucial aspect of vehicle maintenance that can significantly extend the life of your transmission and save you thousands in potential repair costs. While the process may seem intimidating at first, with the right tools, preparation, and guidance, many car owners can successfully perform this maintenance task themselves.
Remember to always use the correct fluid for your specific vehicle, follow safety precautions, and consult your owner's manual for manufacturer-specific instructions. If you encounter any complications or feel uncomfortable with the process, contact Blue Ridge Automotive – European & Domestic for reliable help with your transmission service needs.
About Blue Ridge Automotive – European & Domestic
Blue Ridge Automotive – European & Domestic provides dependable vehicle maintenance and repair solutions built around precision, quality, and care. Our experienced team understands the technical details that matter most for reliable performance, including fluid services for all types of transmissions.
We take pride in offering hands-on expertise and trusted guidance for drivers looking to keep their vehicles running at their best. Contact us to schedule your next service or get answers to your transmission questions.
Have you ever heard a strange humming or grinding noise while driving that seems to get louder as you accelerate? That mysterious sound might be more than just an annoyance; it could be a warning sign of failing wheel bearings.
Wheel bearings are critical components that allow your wheels to spin freely while supporting the weight of your vehicle. When they begin to fail, they don't just create annoying sounds; they compromise your vehicle's safety and handling. At Blue Ridge Automotive – European & Domestic, we see vehicles with wheel bearing issues every day.
In this comprehensive guide, we'll explore wheel bearing failure symptoms, decode the various sounds they make, and outline practical solutions to address these issues before they escalate into major repairs. Let's dive into everything you need to know about wheel bearing health and maintenance.
Discover How Wheel Bearings Keep You Safe on the Road
Wheel bearings are precision-engineered steel balls or rollers housed in a metal ring called a race. They're designed to reduce friction between the wheel hub and the axle, allowing your wheels to rotate smoothly while supporting the weight of your vehicle.
These seemingly simple components perform a complex and vital function in your vehicle's operation. Each wheel on your vehicle has its wheel bearing assembly. These bearings are packed with grease and sealed to keep contaminants out and lubricant in.
Modern wheel bearings are typically sealed units that aren't serviceable and must be replaced when they fail. However, some older vehicles may have bearings that can be repacked with grease during maintenance.
The importance of wheel bearings cannot be overstated. They not only enable smooth wheel rotation but also:
- Support the vehicle's weight while distributing loads evenly
- Allow minimal friction between moving parts, improving fuel efficiency
- Help maintain proper tire contact with the road for optimal handling
When wheel bearings begin to fail, your vehicle's safety and performance are directly affected. Excessive play in the bearings can lead to irregular tire wear, poor handling, and in extreme cases, complete wheel detachment, a catastrophic failure you certainly want to avoid. That's why understanding the signs of wheel bearing failure is crucial for every vehicle owner.
Catch These Early Signs Before Wheel Bearings Fail
Detecting wheel bearing problems early can save you from more extensive damage and costly repairs. Here are the key warning signs to watch for:
Unusual Noises
The most common symptom of a failing wheel bearing is noise. As bearings wear down, they produce the following distinctive sounds that often change with vehicle speed or when turning:
- Humming or Droning: A constant, low-pitched humming noise that increases with speed often indicates bearing wear.
- Growling or Rumbling: These deeper sounds typically occur when the bearing has significant damage.
- Clicking or Popping: These noises, especially during turns, suggest advanced bearing deterioration.
- Grinding: A harsh grinding sound usually means the bearing has little to no lubricant left, and metal-on-metal contact is occurring.
These noises may be more noticeable when accelerating, decelerating, or making turns. Many drivers report that the sound changes when turning in one direction versus the other, and this can help pinpoint which wheel bearing is failing.
Steering and Handling Issues
Failing wheel bearings don't just make noise; they affect how your vehicle handles. Look out for:
- Steering wheel vibration that increases with speed
- The vehicle is pulling to one side during normal driving
- Loose or "wandering" steering feel
- Increased steering effort, especially during turns
These wheel bearing failure symptoms can sometimes be confused with alignment or tire issues, but when combined with unusual noises, they strongly suggest wheel bearing problems. At Blue Ridge Automotive – European & Domestic, our technicians can perform a thorough inspection to determine exactly what's causing these symptoms.
Visible Wear and Physical Symptoms
In addition to sounds and handling changes, physical signs can indicate wheel bearing issues:
- Uneven tire wear, particularly on the inner or outer edges
- Excessive heat around the wheel hub (which you might notice when washing your car)
- Visible play or movement in the wheel when jacked up and checked
- ABS warning light illumination (modern wheel bearings often house ABS sensors)
If you notice any of these symptoms, it's important to have your vehicle inspected promptly. Wheel bearing problems typically worsen over time, and addressing them early can prevent more serious damage to related components.
DIY Ways to Check for Wheel Bearing Trouble
While professional diagnosis is always recommended for wheel bearing issues, there are a few checks you can perform yourself to help determine if your suspicions are correct.
The first and simplest check is the "road test" method. Find a safe, straight road with minimal traffic and drive at a moderate speed (around 40 mph). Gently shift your vehicle's weight from side to side by slightly turning the steering wheel. If a wheel bearing is failing, the noise will often increase when you put weight on the affected side.
For a more hands-on approach, you can perform a basic wheel check if you have the tools and knowledge to safely jack up your vehicle:
- Properly secure your vehicle on jack stands (never rely solely on a jack)
- Grip the tire at the 12 and 6 o'clock positions and try to rock it
- Then grip at the 3 and 9 o'clock positions and repeat
Any noticeable movement or play could indicate a failing wheel bearing. However, some movement is normal in vehicles with certain suspension designs, so it's important to compare both sides of the vehicle.
Remember that wheel bearings aren't the only components that can cause similar symptoms. Worn suspension parts, damaged CV joints, or tire issues can produce comparable noises and handling problems.
That's why professional diagnosis from a trusted shop like Blue Ridge Automotive – European & Domestic is invaluable; our experienced technicians can distinguish between these various issues and provide an accurate assessment.
Decode Wheel Bearing Noises and Their Severity
The sounds produced by failing wheel bearings can tell you a lot about the severity of the problem. Learning to interpret these noises can help you decide how urgently you need to address the issue.
Types of Wheel Bearing Noises
Different sounds typically correspond to different stages of bearing wear:
Early Stage Failure
- A subtle humming or drone that's most noticeable at highway speeds
- Noise that increases or decreases proportionally with vehicle speed
- Sound may disappear at certain speeds and reappear at others
Moderate Failure
- More pronounced growling or rumbling that's audible
- Noise that changes when turning or shifting weight in the vehicle
- Sound that worsens when cornering in one direction (typically louder when turning toward the affected side)
Advanced Failure
- Loud grinding or scraping that's impossible to ignore
- Constant noise regardless of speed or direction
- May be accompanied by vibration felt through the floor or steering wheel
The location of the noise can also help identify which bearing is failing. Front wheel bearing noise is often more noticeable when turning, while rear wheel bearing noise tends to be more constant. Noise from driver-side bearings is typically more audible to the driver, while passenger-side bearing noise might seem more distant.
It's important to note that wheel bearing noises can sometimes be confused with other issues. For example, tire noise from uneven wear patterns can mimic bearing sounds, and certain brake problems can produce similar grinding noises. This is why professional diagnosis from the skilled technicians at our brake services department can be invaluable in pinpointing the exact cause.
Know When It’s Time to Replace Wheel Bearings
Knowing when to replace wheel bearings is crucial for maintaining vehicle safety and preventing cascading damage to other components. Here's what you need to know about timing and necessity:
When Replacement Is Necessary
Unlike some vehicle components that can be serviced or repaired, modern wheel bearings are typically sealed units that must be replaced entirely when they fail. Here are some scenarios that necessitate replacement:
- When bearing noise becomes noticeable and consistent
- If there's any detectable play in the wheel when checked
- After significant water exposure (such as deep flooding)
- Following certain accidents or impacts that could damage the bearings
- As a preventive measure, when replacing other related components
- When an ABS sensor integrated with the bearing assembly fails
Typically, wheel bearings are designed to last 85,000-100,000 miles under normal driving conditions. However, factors like rough roads, frequent puddles or water crossings, and heavy loads can significantly reduce their lifespan.
The Replacement Process
Wheel bearing replacement is not typically a DIY job for most vehicle owners. The process requires specialized tools, precise torque specifications, and technical knowledge. Here's a simplified overview of what the replacement process involves:
- The vehicle is lifted and secured on a lift or jack stands
- Wheel and brake components are removed for access
- The hub assembly is detached (methods vary by vehicle design)
- The old bearing is pressed out, or the entire hub/bearing assembly is replaced
- New components are installed following the manufacturer's specifications
- Proper torque is applied to all fasteners
- The system is reassembled and tested
Many modern vehicles use hub assemblies that include the wheel bearing, hub, and sometimes the ABS sensor in a single unit. These "hub bearing assemblies" simplify the replacement process but can be more expensive than traditional bearings.
At Blue Ridge Automotive – European & Domestic, our certified technicians have the tools and expertise to properly diagnose and replace wheel bearings on virtually any make and model. We ensure that all specifications are followed precisely, which is critical for bearing longevity and proper vehicle handling.
Pro Tips to Extend the Life of Your Wheel Bearings
While wheel bearings eventually wear out regardless of maintenance, their lifespan can be significantly extended through proper care and driving habits. Here are effective strategies to help prevent premature wheel bearing failure:
Driving Habits That Protect Your Bearings
How you drive and where you drive can have a substantial impact on wheel bearing life:
- Avoid hitting potholes and curbs when possible
- Reduce speed when driving on rough or uneven roads
- Avoid driving through deep water or puddles when you can
- Don't overload your vehicle beyond the manufacturer's specifications
- Use caution when towing to avoid excess strain on bearings
Maintenance Practices
Regular maintenance can help identify potential bearing issues before they become serious problems:
- Have your suspension checked regularly as part of routine maintenance
- Pay attention to tire wear patterns that might indicate bearing issues
- Address any unusual noises promptly
- Ensure proper wheel alignment and tire balance
On older vehicles with serviceable bearings, periodic repacking with fresh grease can extend bearing life. However, most modern vehicles use sealed bearings that cannot be serviced this way.
It's also worth noting that wheel bearings work in concert with other suspension components. Worn shocks and struts can place additional stress on wheel bearings, leading to premature failure. Maintaining your entire suspension system helps protect your bearings and other components.
Why Ignoring Wheel Bearing Issues Can Cost You More

Delaying wheel bearing replacement when problems arise can lead to significant consequences, both financially and safety-wise. Here's what can happen if wheel bearing issues are left unaddressed:
Safety Implications
Failing wheel bearings create the following serious safety hazards:
- Reduced vehicle control and unpredictable handling
- Compromised braking performance
- Risk of wheel seizure at high speeds
- In extreme cases, complete wheel detachment
These safety risks increase dramatically as bearing deterioration progresses. What starts as an annoying noise can quickly evolve into a dangerous driving condition.
Cascading Damage
When wheel bearings fail, they rarely fail alone. Expect these issues with wheel bearing failure:
- Damage to the wheel hub and spindle
- ABS sensor failure
- CV joint damage
- Potential damage to brake components
- Accelerated and uneven tire wear
The cost of repairing this cascade of damage is typically much higher than addressing the bearing issue early. What might start as a $300-500 repair can easily balloon into repairs costing $1,000 or more when additional components become damaged.
Additionally, catastrophic bearing failure often leaves drivers stranded, necessitating a tow and creating inconvenience beyond just the repair costs. For busy professionals or families, this unexpected downtime can be particularly problematic.
At Blue Ridge Automotive – European & Domestic, we've seen countless examples of minor bearing issues that evolved into major repairs because they were ignored. Our approach focuses on identifying these problems early during routine maintenance, potentially saving our clients significant money and hassle.
Frequently Asked Questions
How long can I drive with a bad wheel bearing?
While you might be able to drive for hundreds or even thousands of miles with early signs of wheel bearing wear, it's not recommended to drive any longer than necessary once you notice symptoms. A completely failed bearing can lock up without warning, causing you to lose control of your vehicle.
As soon as you identify wheel bearing noise or other symptoms, schedule a repair as soon as possible. Safety should always be your priority when dealing with critical components like wheel bearings.
Will a bad wheel bearing affect braking performance?
Yes, a failing wheel bearing can impact your braking performance. As the bearing deteriorates, it creates excessive play in the wheel assembly, which can cause uneven braking and increased stopping distances.
In vehicles with ABS, the wheel speed sensors are often integrated with the bearing assembly, so bearing failure can trigger ABS malfunctions or warning lights. Additionally, the heat generated by a failing bearing can potentially damage nearby brake components, further compromising your vehicle's stopping ability.
Can wheel bearings fail suddenly without warning?
While sudden, catastrophic wheel bearing failure without prior warning is rare, it can happen. Most wheel bearings deteriorate gradually, providing symptoms like noise and vibration for weeks or months before complete failure. However, severe impacts (like hitting a large pothole at high speed) can cause immediate damage that leads to rapid failure.
Water contamination from driving through deep puddles or floods can also wash away bearing lubricant, causing accelerated wear and potentially sudden failure. Regular vehicle inspections can help catch bearing issues before they reach this point.
Do I need to replace wheel bearings in pairs?
Unlike some components like struts or brake pads, wheel bearings don't necessarily need to be replaced in pairs. Each bearing wears independently based on road conditions, driving habits, and manufacturing variations.
However, if both front and rear bearings have similar mileage and one has failed, it's often wise to consider replacing both as a preventive maintenance measure. This approach can save you time and labor costs, as much of the expense in bearing replacement is in the labor rather than the parts themselves.
What's the average cost to replace wheel bearings?
Wheel bearing replacement costs vary significantly depending on your vehicle make and model, the type of bearing assembly, and your geographic location. On average, you can expect to pay between $250 and $500 per wheel for bearing replacement, including parts and labor.
Some luxury or specialized vehicles may cost more, sometimes exceeding $700 per wheel. Front wheel bearings often cost more to replace than rear ones due to their more complex design in many vehicles. Getting multiple quotes from reputable shops like ours can help ensure you're getting a fair price for quality work.
Contact Blue Ridge Automotive – European & Domestic for Reliable Wheel Bearing Repair
Wheel bearings may be small components, but they play a massive role in your vehicle's safety and performance. Understanding the signs and sounds of wheel bearing failure empowers you to address issues before they escalate into dangerous and expensive problems.
From the distinctive humming and grinding noises to handling changes and physical symptoms, recognizing these warning signs early can save you significant money and prevent potential safety hazards on the road.
Remember that proper maintenance and careful driving habits can extend bearing life, but all bearings eventually require replacement. When that time comes, connect with Blue Ridge Automotive – European & Domestic for trusted wheel bearing diagnostics and replacement services tailored to your specific vehicle.
About Blue Ridge Automotive – European & Domestic
We provide trusted automotive care with a focus on safety, performance, and long-term value. Our team of certified technicians delivers reliable repair services, with deep experience in diagnosing and resolving wheel bearing issues across a wide range of vehicles.
Blue Ridge Automotive – European & Domestic is committed to keeping your vehicle running smoothly with precision maintenance and repairs backed by years of hands-on experience. Contact us today to book an appointment or learn more about our services.
When automobiles first appeared on American roads in the early 1900s, few could imagine the profound transformation awaiting the auto repair industry. The history of auto mechanics is a story of adaptation, innovation, and technological revolution that parallels the evolution of the vehicles themselves.
From early blacksmith-run workshops to today's high-tech diagnostic centers, automotive repair has become a dynamic, skilled profession crucial to keeping America moving.
Early Beginnings: Blacksmiths and Bicycle Mechanics (1890s-1920s)
In the earliest days, cars were rare and unreliable, maintained by blacksmiths, bicycle repairmen, and machinery tinkerers. There was no formal auto repair industry yet. Blacksmith shops adapted to the needs of the motorized carriages, offering basic repairs using skills honed on wagons and horseshoes.
By 1910, as Ford's Model T made cars more accessible, dedicated repair shops emerged, often operating from converted stables or carriage houses. Mechanics relied heavily on intuition and improvised tools to fix mechanical issues. Service stations that sold fuel and offered maintenance created the foundation for the modern auto repair shop model.
Growth and Standardization (1930s-1950s)
Despite the economic strains of the Great Depression, car ownership remained widespread. The need for standardized repair methods grew. Manufacturers began publishing detailed service manuals, offering mechanics consistent guidance. Training programs emerged, formalizing what was once only learned through experience.
The 1940s, driven by the demands of WWII, produced a generation of skilled mechanics trained on military vehicles. After the war, many veterans opened repair shops, helping to fuel a boom in car maintenance services. The late 1940s and 1950s saw the rise of dealership service centers alongside independent garages, introducing multi-bay layouts and service advisors, structures still common today.
The Age of Specialization (1960s-1970s)
As cars became more complex, specialization became essential. The arrival of imported vehicles, emission control systems, and electronic ignitions demanded new knowledge. Dedicated import repair shops and specialists for systems like brake repairs and steering, and suspension repairs began to appear.
The establishment of the National Institute for Automotive Service Excellence (ASE) in 1972 helped standardize mechanic qualifications. Certification became important, ensuring that customers could identify well-trained technicians. This period laid the groundwork for a rapidly approaching technological shift.
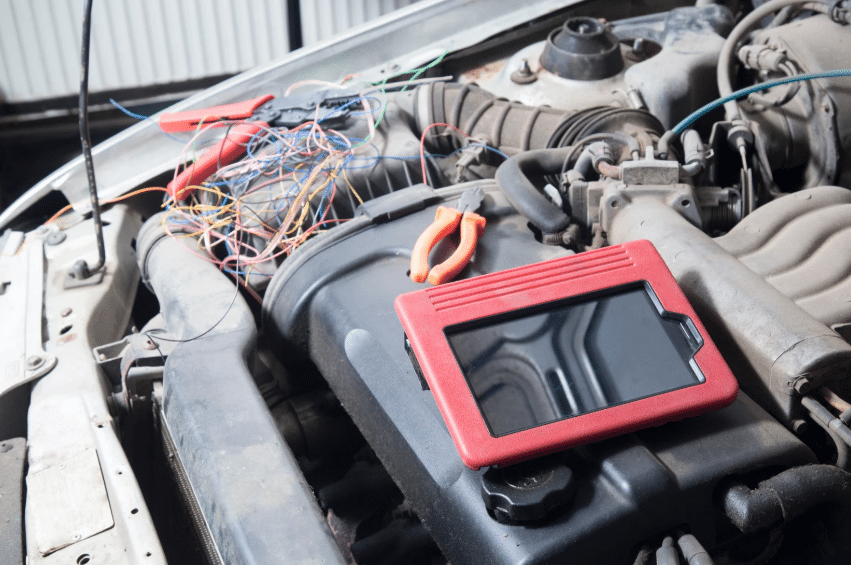
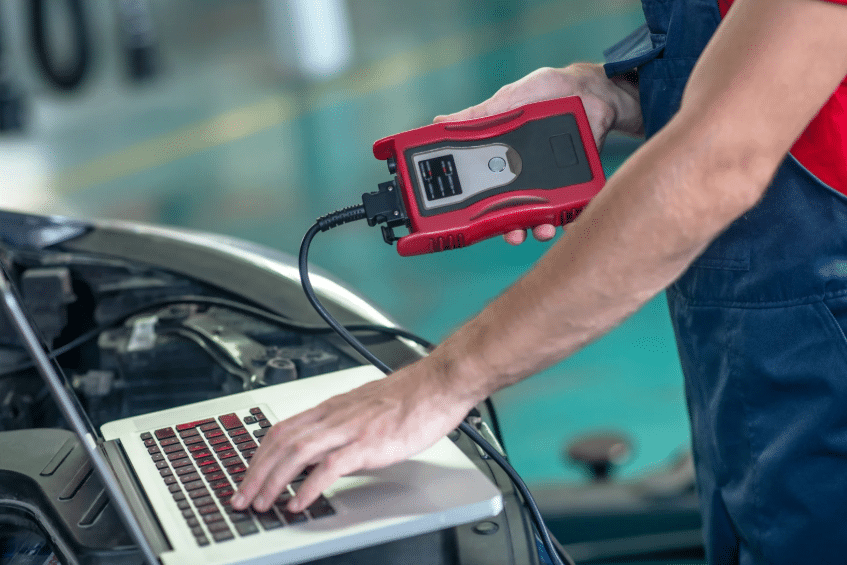
The Computer Revolution (1980s-1990s)
The introduction of onboard computers and early On-Board Diagnostics (OBD) systems in the 1980s marked a turning point. Technicians now needed to understand electronics, not just mechanics. Diagnostic scan tools became critical, allowing mechanics to read fault codes and access real-time performance data. Blue Ridge Automotive – European & Domestic offers car diagnostic services to ensure accurate troubleshooting and repairs.
By 1996, OBD-II systems became standard, dramatically improving diagnostic precision and making troubleshooting more efficient. Training shifted to include electronics, sensors, and network systems. The divide between tech-savvy shops and those resistant to change grew wider.
During this time, essential services such as car engine repairs and transmission repairs demanded even greater technical expertise, as computerized components became more common in powertrains. This marked the start of a more structured automotive diagnostic process, streamlining how technicians approached problem-solving in modern vehicles.
The Digital Diagnostic Era (2000s-Present)
The 21st century has pushed digital diagnostics even further. Wireless diagnostic tools, cloud-based platforms, and remote access to manufacturer databases have become essential. Today's vehicles contain up to 100 interconnected computers managing everything from engine performance to driver assistance systems.
Technicians must now master digital tools, network protocols like CAN systems, and calibration procedures for advanced safety features. Electric and hybrid vehicles require certification in high-voltage systems, while remote diagnostics and predictive maintenance are changing customer expectations. Our coolant leak repair services ensure your engine stays protected under any driving conditions.
AI and machine learning are also starting to influence diagnostics, allowing systems to predict failures before they occur. This rise in AI automotive diagnostics is changing the landscape of preventive maintenance. Technicians are increasingly part-software specialists, part-mechanical experts, blending old-world craftsmanship with cutting-edge technology.
Meanwhile, services such as car exhaust repair and oil leak repair have evolved to incorporate precise digital assessments, ensuring efficient and accurate fixes that extend vehicle longevity.
Modern Diagnostic Practices: What Is Automotive Diagnostics?
What is automotive diagnostics? It’s the process of identifying, analyzing, and resolving mechanical and electronic issues in a vehicle using specialized tools and software. Today’s automotive diagnostic process involves interpreting real-time data from multiple systems to ensure vehicle performance, safety, and reliability.
These tools allow technicians to pinpoint issues more quickly than ever before, from minor sensor malfunctions to complex powertrain failures. This level of insight ensures faster, more effective repairs and reduces guesswork, ultimately saving time and money.
The Shift from Guesswork to Precision

One of the most remarkable changes in the auto industry has been the shift from trial-and-error repair methods to highly accurate diagnostics. In the past, mechanics often had to replace parts one at a time until the issue was resolved. This process was not only costly but also frustrating for vehicle owners.
Modern diagnostic tools eliminate much of this guesswork. With just a few scans, technicians can locate the root cause of a problem with near-pinpoint accuracy. This has led to more efficient repairs, reduced labor costs, and improved customer satisfaction.
Furthermore, diagnostic software is frequently updated with new data, ensuring compatibility with the latest vehicle models and technology. This makes it easier for technicians to stay ahead of emerging issues and service requirements.
The Human Element in a Digital Age
While technology has transformed the automotive repair industry, the role of the technician remains essential. Diagnostic tools provide information, but interpreting that data accurately still requires skill and experience. Technicians must combine digital data with mechanical insight to make the right repair decisions.
Customer communication has also evolved. With access to detailed diagnostic reports, shops can better explain issues and repair recommendations. This transparency builds trust and improves the overall service experience.
AI systems are designed to enhance, not replace, technicians. When used correctly, AI helps reduce diagnostic errors and improve repair timelines, giving technicians the ability to focus on critical tasks that require hands-on expertise.
Training the Next Generation of Technicians
As the industry advances, training programs must evolve alongside it. The next generation of technicians must be well-versed in both mechanical systems and digital diagnostics. Programs now include modules on software troubleshooting, electronic systems, and even cybersecurity as vehicles become more connected.
Continued education is vital. With every new model release, new diagnostic tools and processes are introduced. Technicians must engage in ongoing learning to stay current and remain competitive.
In addition, certifications like ASE remain critical benchmarks of quality. These certifications are increasingly incorporating diagnostic competency to reflect the growing importance of technology in auto repair.
The Broader Impact of Evolving Diagnostics
The advancements in diagnostics extend beyond individual repairs. Fleet operators now use advanced diagnostics to monitor entire fleets in real time. This allows for predictive maintenance scheduling, reduced downtime, and lower operational costs.
Consumers also benefit from enhanced diagnostics through features like remote monitoring and in-dash maintenance alerts. These tools empower car owners to take proactive steps before problems escalate, reducing long-term repair costs.
Environmental impact is another important consideration. Improved diagnostics reduce unnecessary part replacements and minimize waste. They also help maintain fuel efficiency and reduce emissions by keeping vehicles running at optimal performance.
Evolution of Auto Repair Shops and Customer Service
Alongside technological advancements, the structure of auto repair businesses has evolved. Franchise chains emerged, offering standardized services and branding. Mobile repair services gained popularity, offering customers convenience and flexibility.
Modern shops now integrate digital customer service features like online scheduling, CRM systems, and real-time updates. Environmental considerations have also reshaped shop practices, with stricter disposal regulations and greener products. Preventive maintenance has become a priority, aiming to reduce costly repairs through regular checkups like oil change services and car maintenance services.
Services have expanded beyond repairs to include customization, detailing, and advanced diagnostics. Additionally, the rise of tire repair services has become essential, as properly maintained tires are crucial for both performance and safety in today's high-tech vehicles.
The Future of Auto Repair
Looking ahead, augmented reality tools, expanded use of AI, remote repair capabilities, and a surge in electric vehicle service demands are set to transform the profession yet again. Autonomous vehicle systems will introduce entirely new maintenance categories, while sustainability will drive innovations in parts recycling and repair methods.
Auto technicians of the future will need to embrace continuous learning, adapt to new technologies, and prioritize digital literacy as much as mechanical skill. The same spirit of ingenuity that defined the early blacksmiths will continue to guide the industry through its next evolution.
Contact Blue Ridge Automotive – European & Domestic to Keep Your Vehicle Running at Its Best
Ready to experience the benefits of modern auto care rooted in decades of trusted expertise? Reach out to Blue Ridge Automotive – European & Domestic today. At Blue Ridge Automotive – European & Domestic, our ASE-certified technicians combine hands-on craftsmanship with advanced diagnostic technology to keep your vehicle performing at its peak.
Whether you drive a classic car, a hybrid, or the latest electric model, we're here to provide the skilled service you deserve. Schedule your appointment now and drive with confidence knowing your car is in expert hands.
Your vehicle's suspension system is more than just a comfort feature; it's a crucial safety component that affects everything from handling to tire wear. Many drivers overlook regular suspension checks until they notice severe problems like uneven tire wear or difficulty controlling their vehicle. By then, the damage often extends beyond the suspension components themselves.
As modern vehicles have evolved with increasingly sophisticated systems, so too have the diagnostic approaches needed to maintain them properly. The transformation from manual inspections to digital diagnostics has revolutionized how mechanics identify suspension issues, making preventative maintenance more accessible than ever.
Understanding why suspension checks matter can save you thousands in unexpected repairs while extending the life of your tires and ensuring your safety on the road. Let's explore the critical relationship between suspension health and vehicle performance, and why regular checks should be part of your car maintenance service.
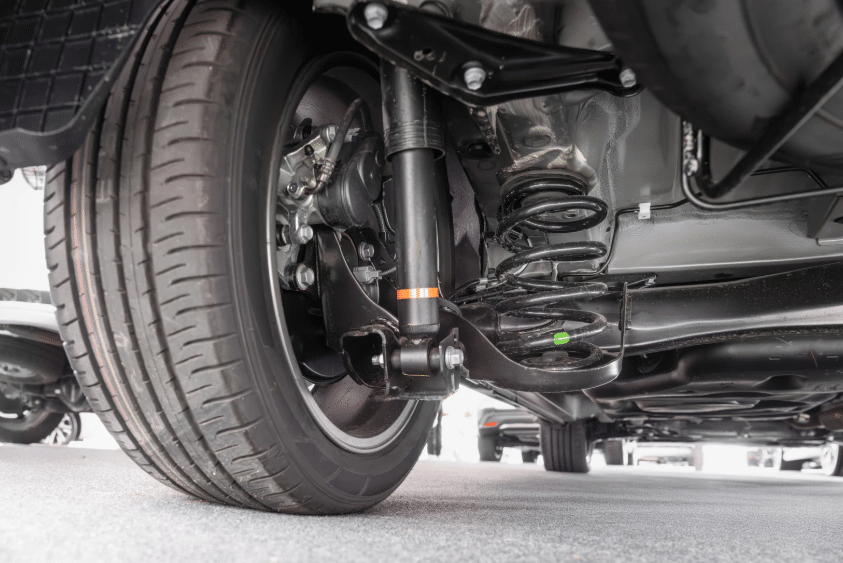
The Critical Role of Your Suspension System
Your vehicle's suspension system connects your car to its wheels, absorbing shocks from the road and maintaining optimal tire contact with the surface. Properly functioning suspension components can improve braking distances by up to 22% on uneven roads.
Key components like shock absorbers, struts, springs, control arms, and bushings stabilize your vehicle. Even on smooth roads, your suspension constantly adjusts to maintain control, leading to gradual wear. This wear intensifies in stop-and-go traffic and rough driving conditions.
How Suspension Issues Accelerate Tire Wear
When suspension parts fail, even weight distribution across tires disappears, causing uneven wear patterns. Here are two of the most common tire wear problems caused by suspension issues:
- Cupping and Scalloping: Worn shocks and struts cause tires to bounce and form dips across the tread.
- Misalignment: Worn control arms or tie rods create improper wheel angles, resulting in uneven tires.
A full set of premium tires can cost $600-$1,200. Proper suspension maintenance can prevent premature tire replacement and ensure consistent road grip, reducing accident risks. If tire issues have already started, timely tire repair can help extend their lifespan.
Steering and Suspension: A Vital Partnership
Steering and suspension systems work together to maintain stability and handling. A well-maintained steering system ensures precise control, while suspension evenly distributes weight for consistent traction. Neglecting one system often compromises the other, leading to increased tire wear and unstable vehicle behavior.
Power steering issues, worn bushings, and misalignment are common culprits. Regular inspections help identify these problems early, preserving both safety and performance.
Safety Implications of Neglected Suspension
Faulty suspension components dramatically increase stopping distances and reduce vehicle control during emergencies. Electronic stability systems like ABS depend on consistent tire contact with the road, which a healthy suspension system ensures.
Understeer, oversteer, and poor weight transfer during turns all point to suspension problems. In emergency maneuvers, worn suspension parts can mean the difference between maintaining control and losing it.
Warning Signs Your Suspension Needs Attention
If you notice any of these suspension issues, it's time to schedule a car diagnostic service to identify and fix the root cause before it worsens:
- Excessive bouncing after bumps
- Clunking, knocking, or squeaking sounds
- Uneven tire wear (cupping, feathering, edge wear)
- Vehicle pulling or wandering while driving straight
- Sagging or tilting when parked
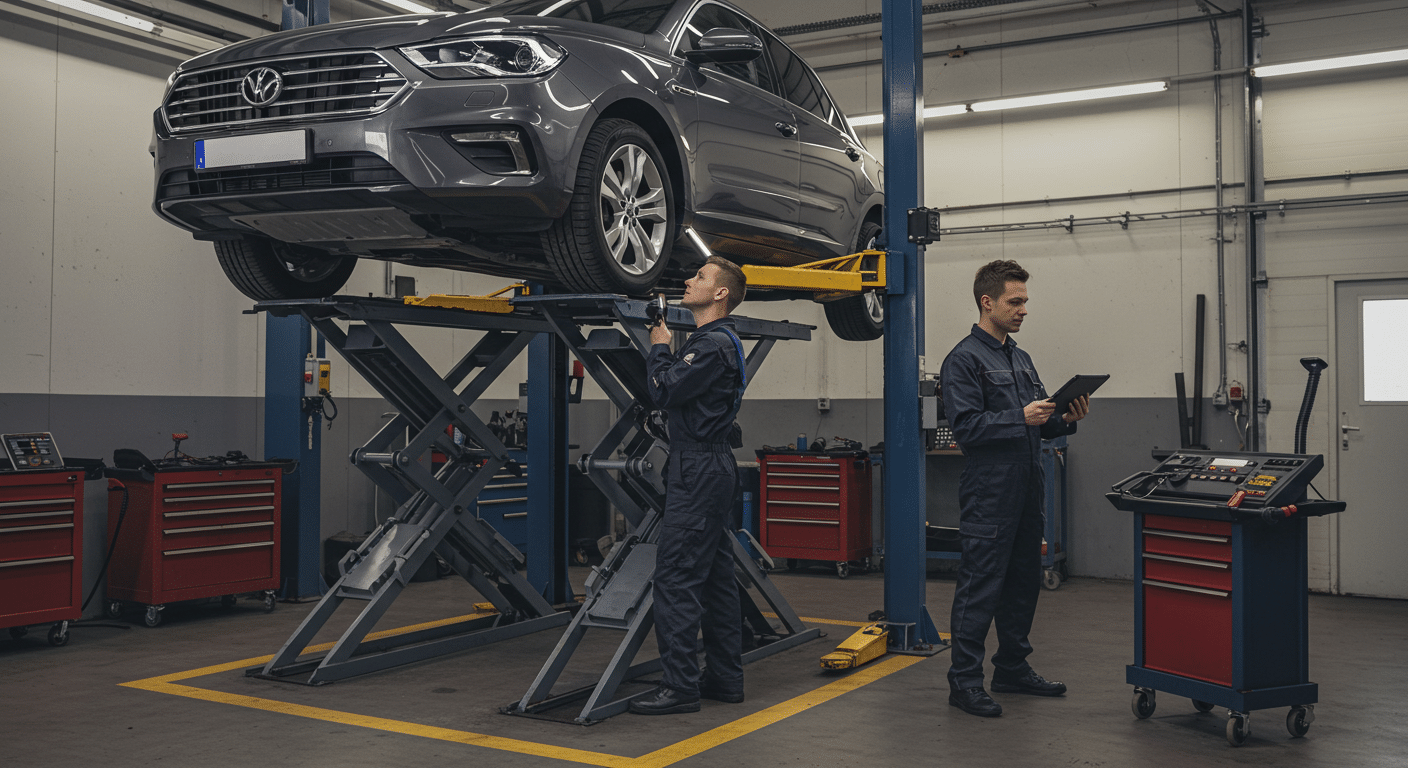
The Professional Suspension Check Process
Professional checks catch problems early, allowing for less expensive repairs and improved safety. A thorough inspection involves several steps:
- Visual Examination: Checking for leaks, cracked bushings, and damaged parts.
- Hands-On Testing: Feeling for excessive play in ball joints, control arms, and tie rods.
- Advanced Diagnostics: Using digital tools to measure shock performance and detect subtle faults.
- Alignment Verification: Ensuring wheel angles meet manufacturer specifications.
- Road Testing: Evaluating real-world handling and listening for noises.
Suspension Maintenance and Its Impact on Tire Wear
A healthy suspension system keeps tires evenly engaged with the road, reducing irregular wear patterns. Misalignment, worn shocks, and damaged springs compromise tire life and overall handling. Routine inspections and timely suspension maintenance, like replacing shocks, adjusting alignment, and maintaining proper tire pressure, protect your investment in both tires and vehicle stability.
Preventative Maintenance: Scheduling and Cost Considerations
Experts recommend a suspension inspection every 12,000-15,000 miles, or every 8,000-10,000 miles for vehicles frequently exposed to rough conditions. Comprehensive inspections typically cost $80-$150, far less than a full suspension overhaul or emergency repairs.
Proactive maintenance extends component life, enhances resale value, and keeps your vehicle safe. In addition to suspension care, keeping up with essential services helps maintain your vehicle's overall health.
Scheduling an oil change service at regular intervals protects your engine, while addressing potential issues early through coolant leak repair ensures optimal cooling performance. Staying proactive with critical systems like brake repair also plays a major role in keeping your vehicle safe on the road.
DIY vs. Professional Suspension Checks
Basic DIY checks (like the bounce test and visual inspections) can spot obvious issues. However, many problems require professional tools and expertise to detect.
Professionals use lifts, shock testers, and alignment machines to identify hidden problems before they escalate. A hybrid approach, regular owner checks combined with scheduled professional suspension inspections, offers the best protection.
Contact Blue Ridge Automotive – European & Domestic to Protect Your Vehicle and Stay Safe
Your suspension system affects far more than ride comfort; it’s crucial for tire longevity, vehicle stability, and your overall safety. Regular suspension checks help catch small issues early, saving money and preventing accidents.
Blue Ridge Automotive – European & Domestic is Atlanta's trusted source for expert steering and suspension repair, complete diagnostics, and preventative maintenance. Our ASE-certified technicians use the latest diagnostic tools to keep your vehicle safe and performing at its best.
Don't wait for signs like bouncing, pulling, or uneven tire wear. Protect your investment and your safety by scheduling a professional suspension check. Contact Blue Ridge Automotive – European & Domestic today to get started!
Frequently Asked Questions
How often should I have my suspension checked?
For most vehicles under normal driving conditions, schedule a professional suspension inspection every 12,000-15,000 miles or annually, whichever comes first.
If you frequently drive on rough roads, carry heavy loads, or notice any warning signs like unusual noises or uneven tire wear, increase this frequency to every 8,000-10,000 miles. Remember that preventative maintenance almost always costs less than reactive repairs after component failure.
What’s the connection between alignment and suspension?
While related, these are distinct aspects of your vehicle's handling system. Your suspension components physically connect your vehicle to its wheels and absorb road impacts, while alignment refers to the precise angles at which your wheels contact the road.
Suspension problems frequently cause alignment issues, but alignment problems don't necessarily indicate suspension damage. However, proper alignment depends on healthy suspension components, which is why comprehensive suspension checks typically include alignment verification.
Can a damaged suspension cause other problems?
Absolutely. Compromised suspension components create a cascade of problems throughout your vehicle. Beyond the obvious tire wear issues, suspension problems place additional strain on steering components, wheel bearings, and even your vehicle's frame.
The constant vibration from poor suspension can damage electronic components and accelerate wear on the engine, transmission mounts, and even your car’s exhaust system. Additionally, the extra stress placed on remaining functional suspension parts and connected systems, like the transmission, accelerates their deterioration, creating a rapidly expanding cycle of damage.
What causes premature suspension wear?
Several factors accelerate suspension wear. Frequent driving on roads with potholes or uneven surfaces creates additional stress on components. Stop-and-go traffic conditions force your suspension to handle repeated weight transfers that accelerate wear.
Overloading your vehicle beyond manufacturer-recommended weight limits places excessive strain on springs, struts, and associated components. Environmental factors like road salt and extreme temperatures can accelerate corrosion and deterioration of rubber bushings. Regular maintenance can help mitigate these factors.
Are aftermarket suspension parts reliable?
Quality varies significantly across aftermarket brands. Premium aftermarket manufacturers often produce components that match or exceed OEM specifications, sometimes offering improved designs or materials that outperform original equipment. However, budget aftermarket parts frequently use inferior materials that deteriorate faster, leading to issues like premature car engine repair, oil leak repair, or even problems with your car’s AC system.
For optimal results, research specific brands and consult with experienced technicians who can recommend reliable aftermarket alternatives when appropriate. Remember that saving money on inferior components typically costs more in the long run through increased frequency of replacement and unexpected repairs.
Your vehicle's transmission is a complex system that often goes unnoticed until problems arise. Regular transmission maintenance isn't just about avoiding costly repairs; it's about extending the overall lifespan of your vehicle. The transmission serves as the crucial link between your engine and wheels, managing power distribution to keep your vehicle running smoothly.
When neglected, transmission issues can cascade into major mechanical failures that may render your vehicle unusable. The good news? With consistent maintenance and early intervention, most serious transmission problems can be prevented entirely.
By understanding how proper transmission care impacts your car's longevity, you can make informed decisions that save you thousands of dollars and countless headaches down the road. Today, we'll explore essential maintenance practices that keep your transmission healthy, warning signs that demand attention, and expert tips for maximizing your vehicle's lifespan through proper transmission care.
Understanding Your Vehicle's Transmission System
The automotive industry has seen remarkable advancements in transmission technology over the decades. The evolution of car diagnostic services has transformed from basic mechanical observations to sophisticated computer-based analyses that can detect problems before they become serious issues.
These advancements allow for more precise maintenance and earlier intervention when problems begin to develop. Understanding your specific transmission type helps you recognize normal operation versus concerning symptoms. This knowledge forms the foundation for proper maintenance and timely repairs that extend your vehicle's useful life.
At its core, your transmission:
- Converts the engine's power into torque that propels your vehicle forward
- Consists of gears, hydraulic systems, electronic components, and specialized fluid
- Requires all components to work together seamlessly for proper function
Adapting Maintenance for Different Transmission Types
Each transmission type, whether automatic, manual, or CVT, has unique maintenance requirements and common failure points. Understanding these differences helps you provide appropriate care for your specific vehicle configuration.
Automatic Transmissions:
- Most common in North American vehicles.
- Rely on hydraulic systems and require regular fluid changes.
- Fluid degrades faster due to heat during operation.
- May need occasional band adjustments (though many newer models self-adjust).
Manual Transmissions:
- Require less frequent maintenance than automatics.
- Main needs include clutch adjustments, clutch replacements, and gear oil changes.
- Simpler design often leads to a longer lifespan when properly maintained.
- Clutch replacement is a major service that manual drivers should expect.
CVT (Continuously Variable Transmissions):
- Use a belt and pulley system instead of traditional gears.
- Require specialized CVT fluid (never substitute with regular automatic transmission fluid).
- More sensitive to fluid conditions and often need fluid changes every 30,000 miles or less.
Hybrid vehicles often use unique transmission systems that combine elements of CVTs with electric motor drive components. These systems typically require dealer service due to their specialized nature and high-voltage components that require specific safety protocols during maintenance.
The Critical Role of Transmission Fluid
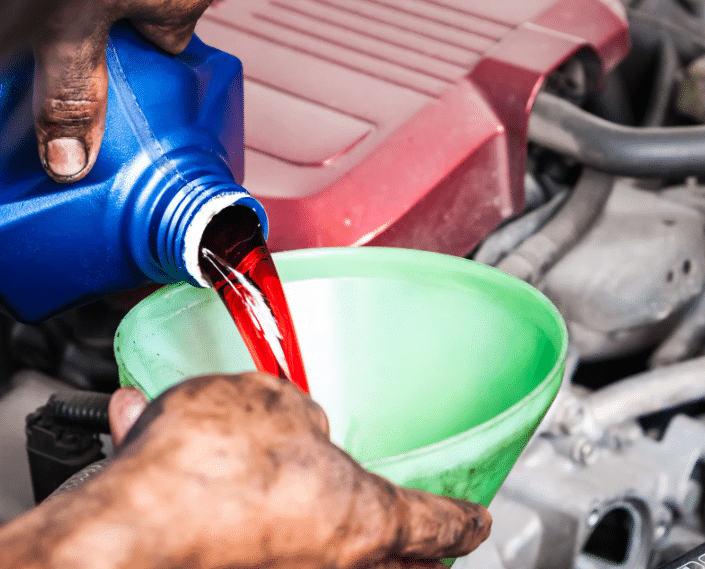
Transmission fluid is the lifeblood of your transmission system, performing multiple essential functions simultaneously. It lubricates moving parts, prevents overheating, transmits hydraulic pressure, and even helps clean the system of debris.
Without proper fluid maintenance, even the most well-designed transmission will fail prematurely. Fluid degradation occurs naturally over time due to heat, pressure, and normal use. As it breaks down, the fluid loses its protective qualities and can become harmful, carrying abrasive particles throughout your transmission.
The typical transmission fluid should be changed every 30,000 to 60,000 miles, though this varies by vehicle make and model. For vehicles under heavy strain, like those used for towing or in stop-and-go traffic, more frequent service is recommended.
Checking your transmission fluid regularly is a simple yet effective maintenance practice. The fluid should be bright red or pink, not brown or black, and should have a sweet smell rather than a burnt odor. The level should fall between the minimum and maximum markers on the dipstick, and the fluid should be free of particles or debris.
Warning Signs of Transmission Problems
Recognizing early warning signs of transmission trouble can save you from catastrophic failure and expensive repairs. Your vehicle often communicates potential issues before major problems develop, giving you the opportunity for early intervention if you know what to look for:
- Unusual noises such as grinding, whining, or humming during acceleration or gear changes may indicate worn bearings, damaged gears, or low fluid levels.
- Burning smells often suggest overheated transmission fluid, which requires immediate attention to prevent system damage.
- Erratic shifting, such as hesitation, slipping out of gear, or rough transitions, is a red flag that something isn’t functioning properly.
- Visible fluid leaks under your parked vehicle, especially red or pink spots, can signal transmission leaks. Even small leaks can lead to low fluid levels and severe internal damage.
- Secondary issues like oil leaks or coolant loss might point to larger systemic problems that impact engine and transmission health.
Preventive Maintenance Schedules Worth Following
Establishing and following a regular car maintenance schedule is crucial to extending your transmission's lifespan and avoiding costly repairs.
- Transmission fluid and filter changes are recommended every 30,000 to 60,000 miles.
- Vehicles used in harsh conditions may require more frequent servicing.
- Some modern vehicles claim "lifetime" fluid, but experts recommend changing it every 60,000 to 100,000 miles.
Comprehensive transmission service includes draining old fluid, replacing the filter, cleaning the pan, and refilling with fresh fluid. Some mechanics also perform a transmission flush if necessary.
How Driving Habits Impact Transmission Longevity
Your daily driving habits have a major effect on your transmission's health. You can prolong its life by:
- Coming to a full stop before shifting between drive and reverse
- Avoiding vehicle overloading
- Driving smoothly, avoiding rapid acceleration and hard braking
- Letting your vehicle warm up briefly in cold weather
Good driving habits also prevent excessive strain on brake systems, which indirectly supports your transmission’s longevity.
Professional vs. DIY Transmission Maintenance
While some tasks, like checking fluid levels, can be done at home, more complex procedures such as flushes, filter changes, and internal repairs require professional attention.
Here's a breakdown of what you can handle yourself versus what’s best left to the experts:
- DIY-Friendly Tasks:
- Checking fluid levels and condition using the dipstick
- Looking for visible leaks under the vehicle
- Watching for dashboard warning lights
- Advanced Tasks Requiring a Professional:
- Transmission flushes and fluid/filter replacement
- Diagnosing and repairing slipping, harsh shifting, or delayed engagement
- Electrical diagnostics and internal component repairs
If you notice signs that could indicate a need for transmission or car engine repair, it's smart to have your entire powertrain system inspected together. This ensures small problems don't escalate into major repairs.
The Economics of Transmission Maintenance vs. Replacement
Understanding the financial aspects of transmission maintenance versus replacement helps you make informed decisions about your vehicle's care. Regular maintenance represents a significantly smaller investment than major repairs or replacement, making it the economically sound choice for most vehicle owners.
The cost of routine transmission maintenance typically ranges from $100-300 for fluid and filter changes, depending on your vehicle type and location. Compare this to transmission replacement costs, which commonly range from $1,500 to $3,500 for remanufactured units and $4,000 to $8,000 for new transmissions in many vehicles. For specialized or luxury vehicles, these costs can climb even higher.
Beyond the direct cost comparison, consider the value of avoiding vehicle downtime. Transmission replacements can leave you without transportation for days or even weeks, potentially adding rental car expenses to your total costs. Routine maintenance, by contrast, can often be completed in a few hours.
The relationship between maintenance and vehicle resale value also deserves consideration. A vehicle with documentation of regular transmission service generally commands a higher resale price than one with an unknown maintenance history or documented transmission problems.
For older vehicles, the decision becomes more nuanced. When a transmission fails in a vehicle with low market value, you'll need to evaluate whether replacement makes financial sense compared to investing in a different vehicle. This calculation should include factors like the vehicle's overall condition, expected remaining lifespan, and current market value.
Contact Blue Ridge Automotive – European & Domestic to Keep Your Transmission Running Strong
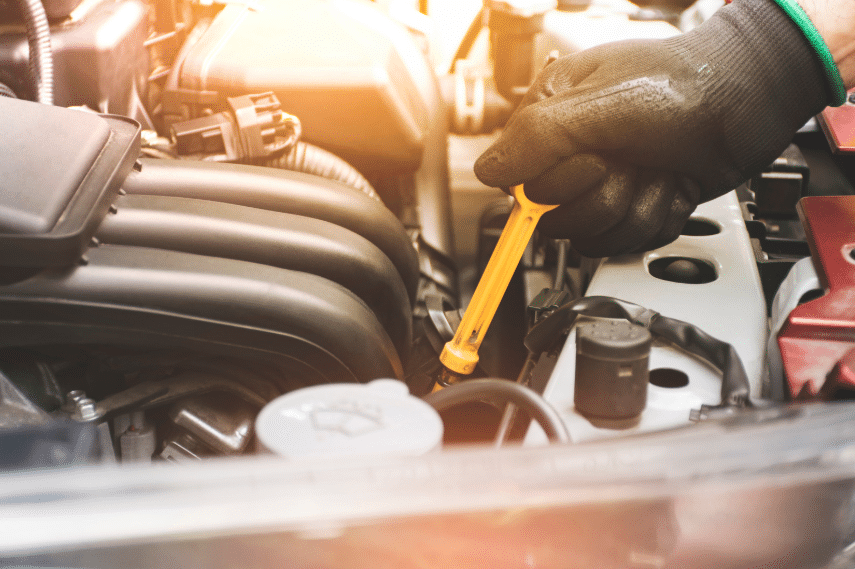
Proper transmission maintenance is one of the smartest investments you can make to extend your vehicle’s life and avoid unexpected breakdowns. Staying ahead with preventive care saves you money, preserves vehicle performance, and protects your investment.
At Blue Ridge Automotive – European & Domestic, our ASE-certified technicians specialize in expert transmission maintenance, diagnostics, and repairs. Contact Blue Ridge Automotive – European & Domestic today to schedule your transmission service and keep your car shifting smoothly for the long haul.
Frequently Asked Questions
How often should I check my transmission fluid level?
You should check your transmission fluid level monthly or before any long trip. This quick check takes only minutes but can prevent costly damage caused by low fluid levels.
For accurate readings, check with the engine running and warmed up, following your owner's manual's specific instructions. Some newer vehicles have sealed transmissions without dipsticks, requiring professional inspection during regular service intervals.
Can I use any transmission fluid in my vehicle?
No, you must use the specific transmission fluid type recommended by your vehicle manufacturer. Using incorrect fluid can cause severe damage, even if the vehicle initially seems to operate normally.
Transmission fluids vary in viscosity, friction characteristics, and additive packages designed for specific transmission designs. Your owner's manual specifies the correct fluid type, or a professional mechanic can provide this information based on your vehicle's make and model.
What causes transmission fluid to leak?
Transmission fluid leaks commonly stem from degraded seals, loose pan gaskets, damaged fluid lines, or cracked transmission cases. Age and heat gradually harden rubber seals, causing them to shrink and create leak paths. Impact damage from road debris can puncture fluid lines or the transmission pan. Even the pan bolts can loosen over time due to normal vibration. Addressing leaks promptly prevents low fluid conditions that lead to overheating and internal damage.
Is a transmission flush better than a simple fluid change?
This depends on your vehicle's condition and maintenance history. A standard fluid change replaces roughly 40-60% of the old fluid, while a flush replaces nearly all fluid in the system. For vehicles with regular maintenance, a standard change is usually sufficient. However, if maintenance has been neglected or the fluid is significantly degraded, a flush might provide better results. Some manufacturers specifically recommend against flushes, so consult your owner's manual before proceeding with this service.
How long should a well-maintained transmission last?
With proper maintenance, most modern transmissions can last 200,000 miles or more. Factors affecting longevity include driving conditions, maintenance consistency, vehicle design, and transmission type. Manual transmissions typically outlast automatics when both receive appropriate care.
Regular fluid services, addressing minor issues promptly, and avoiding abusive driving habits contribute significantly to transmission longevity. Some heavy-duty or premium vehicles feature transmissions designed for even longer service lives when properly maintained.
As summer temperatures rise, a functioning car air conditioning system becomes less of a luxury and more of a necessity. Many drivers have experienced that moment of dread when they turn on their AC only to feel lukewarm air blowing through the vents.
This often leads to the question: "How often do you have to recharge your AC in your car?" It's a common concern among vehicle owners, especially as temperatures climb. Unlike other routine maintenance, such as oil changes or tire repairs, AC recharging doesn't follow a strict mileage or schedule.
Understanding when and why your car's AC needs recharging can save you from uncomfortable drives and potentially costly repairs. In this comprehensive guide, we'll explore the factors that determine recharging frequency, signs that your system needs attention, and best practices for maintaining optimal cooling performance.
Understanding Your Car's AC System
Before diving into recharging schedules, it's essential to understand how your car's AC system works. Your vehicle's air conditioning operates as a closed system that circulates refrigerant (commonly known as Freon, though modern cars use more environmentally friendly alternatives like R-134a or R-1234YF).
The refrigerant cycles through various components, including the compressor, condenser, expansion valve, and evaporator. When functioning properly, this system doesn't consume refrigerant. Instead, the refrigerant continuously changes from liquid to gas and back again, absorbing and releasing heat in the process. This cycle is what creates the cooling effect you feel inside your vehicle.
Unlike engine oil that gets used up and needs regular replacement, refrigerant isn't meant to be depleted during normal operation. Theoretically, a perfectly sealed AC system should never need recharging. The need for a recharge typically indicates that your system has developed a leak somewhere in the closed loop.
Modern diagnostic equipment has revolutionized how automotive technicians identify these leaks. What once required lengthy manual inspections can now be pinpointed with precision using specialized tools. If your AC's cooling performance declines, it's best to schedule a professional car AC repair service to get to the root of the issue.
The Myth of Regular AC Recharging
One of the most persistent myths in car maintenance is that air conditioning systems require regular refrigerant recharging as part of routine upkeep. This misconception leads many vehicle owners to unnecessarily recharge their AC systems annually or biannually.
The truth is quite different: a properly functioning AC system should maintain its refrigerant level indefinitely. According to automotive experts, a well-maintained car AC system can go 10-15 years without requiring a refrigerant recharge. If your system needs frequent recharging, it's almost certainly due to a leak that should be addressed rather than temporarily patched with more refrigerant.
In 2022, a study by the Automotive Service Association found that approximately 85% of AC recharge services were performed on systems with detectable leaks rather than as part of necessary maintenance. Simply adding more refrigerant without addressing these leaks is not only wasteful but can potentially damage your AC system components in the long run.
Rather than focusing on a regular recharging schedule, vehicle owners should instead pay attention to their AC's performance and address any signs of reduced cooling efficiency promptly with proper car diagnostic service.
Signs Your Car's AC Needs Recharging

While there's no set schedule for recharging your car's AC, several telltale signs indicate your system might be low on refrigerant. Recognizing these symptoms early can help prevent more extensive damage and keep repair costs down.
The most obvious indicator is reduced cooling capacity. If your AC no longer blows as cold as it once did or takes significantly longer to cool the cabin, this could signal low refrigerant levels. You might notice this especially during idle times or in particularly hot weather when the system is under maximum stress.
Another common sign is the AC compressor cycling on and off more frequently than normal. The compressor has protective mechanisms that prevent it from operating when the refrigerant pressure is too low. If you hear your compressor engaging and disengaging rapidly, this could indicate insufficient refrigerant.
Some vehicles also have visible components of the AC system that can provide clues. For instance, frost or ice formation on AC lines or components often indicates a refrigerant flow problem. Similarly, visible oil stains around AC components may suggest a leak is present. This could also be a sign of a coolant leak that needs professional attention.
Modern vehicles with more advanced climate control systems might display warning lights or error messages when the AC system isn't performing optimally. These built-in diagnostic features have become increasingly sophisticated since 2020, helping drivers identify potential issues before they become major problems.
Factors Affecting AC Recharge Frequency
Several key factors influence how often your car's AC might require recharging. Understanding these can help you better maintain your system and anticipate potential issues.
- Vehicle Age: Older vehicles typically experience more frequent refrigerant loss than newer models. This is partly due to the natural degradation of rubber hoses, seals, and O-rings that occurs over time. Cars manufactured before 2010 often used different types of refrigerants and sealing technologies that are more prone to developing leaks.
- Climate and Usage Patterns: Vehicles in hotter climates, where the AC is used extensively throughout the year, experience more wear and tear on AC components. The more your system runs, the more pressure fluctuations occur, potentially accelerating the development of leaks, which is another reason to keep up with regular car maintenance.
- Quality of Previous Repairs: Perhaps surprisingly, one of the most common causes of refrigerant leaks is improper previous repairs. If a technician didn't properly seal connections or used incorrect parts during a prior AC service, this can lead to premature leaks and the need for more frequent recharging.
- Maintenance History: Vehicles that receive regular maintenance, including inspection of AC components, typically experience fewer refrigerant leaks. Preventative measures like replacing aging hoses before they fail can significantly extend the time between required recharges.
- Type of Refrigerant: Modern vehicles use different refrigerants than older models. R-134a became the standard in the 1990s, replacing the ozone-depleting R-12. Since 2015, many manufacturers have switched to R-1234yf, which has different properties and sometimes requires different system designs that can affect leak potential.
Professional Diagnosis vs. DIY Recharging
With the availability of DIY recharge kits at auto parts stores, many vehicle owners are tempted to handle AC recharging themselves. While this might seem like a cost-effective solution, there are important considerations to weigh before taking the DIY route.
Professional AC diagnosis involves more than simply adding refrigerant. Technicians use specialized equipment to detect the precise location of leaks, measure the exact amount of refrigerant in the system, and evaluate the overall health of components like the compressor and condenser. The evolution of car diagnostic services has made this process more accurate than ever, with tools that can pinpoint even microscopic leaks that would be impossible to detect with the naked eye.
DIY recharge kits, by contrast, typically only allow you to add refrigerant without addressing the underlying cause of the loss. While this might temporarily restore cooling performance, it doesn't solve the root problem. Additionally, overcharging the system is a real risk with DIY methods, which can cause significant damage to your AC components.
Cost-wise, DIY kits may cost $30–$50, while professional diagnostics range from $100–$150. However, early professional leak detection helps avoid compressor failures that cost over $1,000 to fix. If your compressor is already damaged, it may require car engine repair or more.
The Proper AC Maintenance Schedule
While refrigerant recharging isn't a regularly scheduled maintenance item, a proper AC maintenance routine can help maximize the lifespan of your system and minimize the chance of developing leaks that would necessitate recharging.
Experts recommend having your AC system inspected annually, ideally before the hot season begins. This inspection should include:
- A visual check of all accessible components for signs of wear or damage
- Performance testing to evaluate cooling capacity
- A system pressure test to identify potential leaks
- Cleaning of the condenser to ensure optimal heat exchange
- Compressor belt inspection (especially important if you’ve had issues related to oil leaks)
For vehicles over five years old, consider replacing rubber hoses and seals proactively, as these components naturally degrade over time and are common sources of refrigerant leaks. This preventative approach can be far more cost-effective than waiting for leaks to develop.
Many manufacturers recommend replacing the cabin air filter every 15,000-30,000 miles. While this doesn't directly affect refrigerant levels, a clean filter improves airflow and overall system efficiency, reducing strain on AC components.
Neglected systems reduce cooling and increase strain on the engine. For instance, an overworking AC compressor puts additional strain on your engine, potentially affecting fuel economy. Ensuring your AC system operates efficiently is part of maintaining your vehicle's overall health. For complete temperature control, trust our full car AC repair and steering and suspension repair services.
Environmental and Legal Considerations
The refrigerants used in automotive AC systems have significant environmental implications, which have led to regulations governing how these substances are handled. Understanding these considerations is important for any vehicle owner.
Modern refrigerants like R-134a and R-1234yf have less ozone-depleting potential than older types, but they still have environmental impacts. R-134a is a potent greenhouse gas with a global warming potential 1,430 times that of carbon dioxide. The newer R-1234yf has a much lower impact, but is more flammable and expensive.
Due to these environmental concerns, it's illegal in many jurisdictions to intentionally vent refrigerant into the atmosphere. This is one reason why DIY refrigerant recharging can be problematic; proper evacuation of a system requires specialized equipment that recovers the old refrigerant rather than releasing it.
Since 2020, professionals handling automotive refrigerants must be EPA-certified and use approved equipment for recovery and recycling. When you have your AC serviced by certified professionals, you're ensuring compliance with environmental regulations while also protecting the atmosphere.
Looking forward, the automotive industry continues to explore alternatives with even lower environmental impact. Some manufacturers are investigating natural refrigerants or CO2-based systems, while others are improving the efficiency of electric vehicle cooling systems that don't rely on traditional refrigerants at all.
Reach Out to Take Control of Your Car’s Cooling System
So, how often do you have to recharge your AC in your car? Ideally, never, unless there’s a leak. A well-maintained AC system should hold its refrigerant indefinitely. When cooling performance declines, always opt for proper diagnostics and leak repair, not a temporary recharge.
When your system needs attention, trust the ASE-certified technicians at Blue Ridge Automotive – European & Domestic. Our team specializes in thorough car AC repair, car diagnostic service, and complete car maintenance to keep your vehicle road-ready. Contact Blue Ridge Automotive – European & Domestic today to schedule a professional inspection and stay cool all season long.
Frequently Asked Questions
How much does it cost to recharge a car's AC system?
Professional AC recharging typically costs between $150-$300, depending on your vehicle model and the type of refrigerant it requires. Newer vehicles using R-1234yf refrigerant tend to be more expensive to service than older models using R-134a. This price usually includes a basic system inspection, but comprehensive leak detection may incur additional costs. While DIY kits are available for $30-50, they don't address underlying issues and may lead to more expensive repairs later.
Can I drive my car if the AC isn't working properly?
Yes, you can safely drive your vehicle with a malfunctioning AC system. Unlike your engine cooling system, the AC doesn't affect your car's mechanical operation or safety systems. However, driving in extreme heat without AC can lead to driver fatigue and reduced concentration, potentially creating an indirect safety concern.
If your AC compressor is making unusual noises or has seized, it's best to have it checked immediately, as a damaged compressor can affect other engine components if it shares the same drive belt.
How can I tell if my car needs AC refrigerant or has another AC problem?
Reduced cooling performance could be caused by low refrigerant, but also by issues like a faulty compressor, blocked condenser, or electrical problems. If your AC blows cold initially but then warms up, this often indicates low refrigerant. If it never cools at all, the issue might be electrical or mechanical.
Unusual noises when the AC is on typically point to compressor problems rather than refrigerant levels. A proper diagnosis by a qualified technician using specialized equipment is the most reliable way to determine the exact cause of AC problems.
Will adding refrigerant fix my car's AC if it's not cooling properly?
Adding refrigerant will only improve cooling if low refrigerant is the sole issue. If your system has a leak (the most common reason for low refrigerant), adding more will provide only temporary relief before the newly added refrigerant also escapes.
Other issues like a malfunctioning compressor, a clogged expansion valve, or a failed blower motor won't be resolved by adding refrigerant. For lasting repairs, it's essential to identify and fix the root cause rather than simply "topping off" the system.
How long should refrigerants last in a car air conditioning system?
In a properly sealed system with no leaks, refrigerant should last indefinitely. Modern vehicles are designed to maintain their refrigerant charge for the lifetime of the vehicle. If your car needs refrigerant more than once every several years, this indicates a leak that should be repaired.
Statistical data from 2023 shows that properly maintained AC systems in vehicles manufactured after 2015 retain over 95% of their refrigerant charge after five years of normal use, demonstrating that frequent recharging is unnecessary with proper maintenance.
Traffic congestion has become an unavoidable reality for many drivers across America. Whether you're navigating the daily commute in a bustling metropolis or caught in unexpected highway backups, stop-and-go traffic isn't just testing your patience, it's silently taking a toll on your vehicle.
The constant cycle of acceleration and braking creates unique stresses on virtually every system in your car, from the engine and transmission to the brakes and even your fuel economy. While modern vehicles are designed to handle various driving conditions, they still suffer accelerated wear and tear when repeatedly forced to start and stop.
Understanding how this driving pattern affects your vehicle can help you take preventive measures to extend your car's lifespan and avoid costly repairs. The impact goes far beyond the obvious frustration and wasted time, it affects your car's mechanical components, fuel efficiency, and long-term reliability.
In this comprehensive guide, we'll explore the specific ways stop-and-go traffic damages your vehicle, provide practical maintenance tips to mitigate these effects, and offer driving techniques that can help reduce the strain on your car while navigating congested roads.
The Hidden Toll on Your Engine
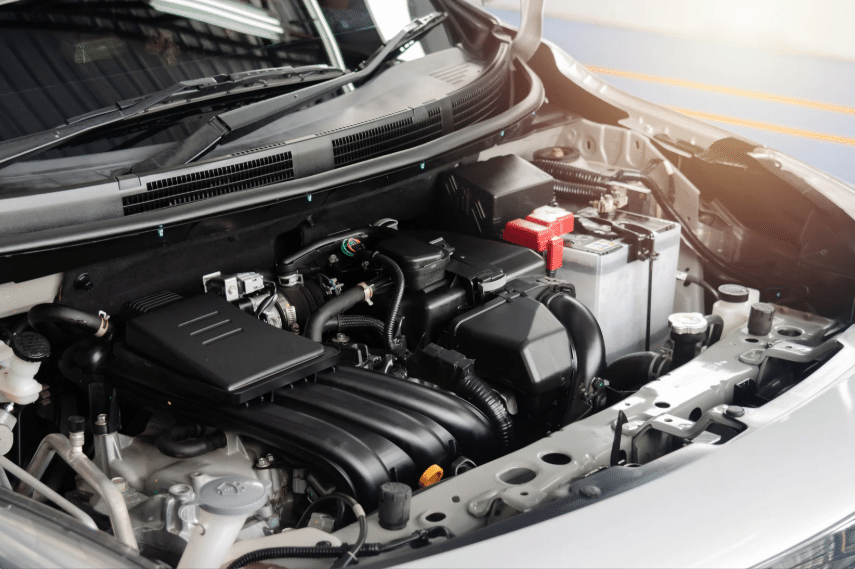
Your car's engine is designed to operate most efficiently at steady speeds. During stop-and-go traffic, your engine repeatedly cycles between idle and acceleration, creating several problems that contribute to premature wear.
First, frequent cold starts are particularly damaging. When your engine doesn't reach its optimal operating temperature, unburned fuel can contaminate your engine oil and reduce its lubricating properties. This issue is compounded in stop-and-go scenarios where the engine may cool between short bursts of operation, preventing it from maintaining ideal operating temperatures.
Carbon deposits also build up more quickly during low-speed, high-RPM driving patterns common in traffic jams. These deposits can form on intake valves, fuel injectors, and combustion chambers, gradually reducing engine performance and efficiency. According to a 2023 study by the Automotive Research Association, engines operating primarily in congested urban environments showed up to 25% more carbon buildup than those used primarily for highway driving.
Additionally, the constant cycling between power demand and idle increases thermal stress on engine components. This fluctuation in temperature can accelerate wear on pistons, cylinder walls, and valves over time, potentially reducing your engine's lifespan by thousands of miles.
Modern vehicles equipped with digital diagnostic systems can detect and report many of these issues before they cause major damage. However, being aware of these hidden effects can help you stay ahead of potential problems.
How Stop-and-Go Driving Accelerates Transmission Damage
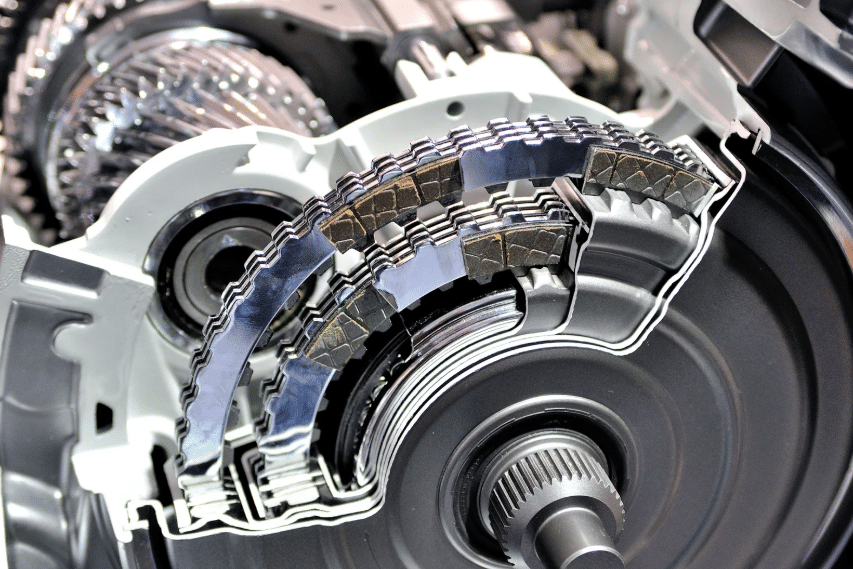
Few vehicle systems suffer more from stop-and-go driving than your transmission, especially in vehicles with automatic transmissions. The constant shifting between gears creates excessive heat and friction within the transmission fluid and components.
Automatic transmissions rely on fluid pressure and friction materials to engage gears. In congested traffic, the transmission fluid temperature rises significantly as it repeatedly engages and disengages the clutch plates. According to automotive engineers, transmission fluid in stop-and-go conditions can reach temperatures up to 30-40 degrees higher than during highway cruising, accelerating fluid breakdown.
This heat accelerates the breakdown of transmission fluid, reducing its lubricating properties and protective qualities. A degraded fluid can't properly protect the precision components inside your transmission, leading to premature wear of bands, clutches, and planetary gears.
Many drivers are unknowingly damaging their car's transmission through habits that seem harmless but compound the stress of stop-and-go driving. For example, shifting into drive while the car is still rolling backward or "riding the brakes" while in drive can significantly increase transmission wear.
Manual transmissions aren't immune either. The frequent clutch engagement required in traffic jams accelerates wear on the clutch plate and flywheel, potentially shortening their service life by thousands of miles compared to highway driving.
Why Stop-and-Go Traffic Rapidly Wears Down Your Brake System
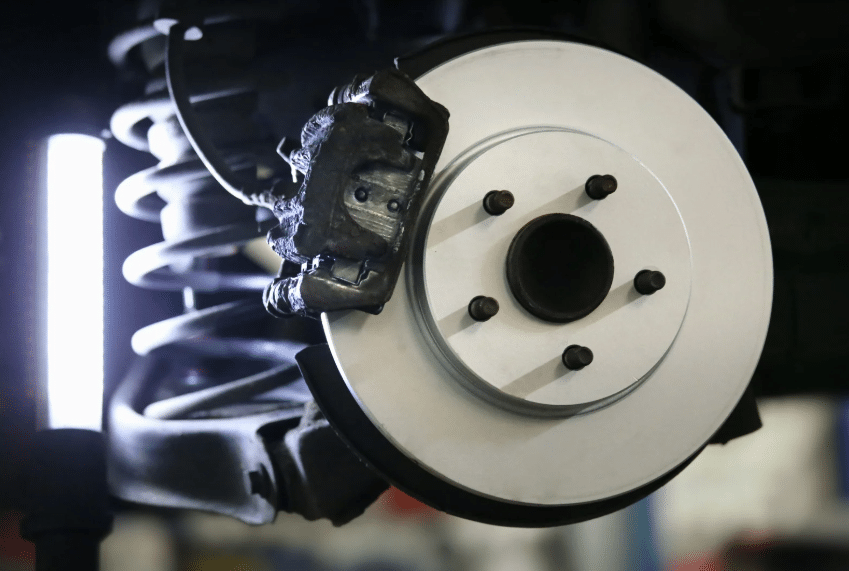
Perhaps the most obvious victims of stop-and-go traffic are your vehicle's brakes. The constant application and release of brakes in congested conditions create excessive heat and friction, accelerating wear on multiple components of your braking system.
Brake pads and rotors bear the brunt of this stress. Each time you press the brake pedal, the pads clamp onto the rotors, converting kinetic energy into heat through friction. In normal driving conditions, these components have time to cool between applications. However, in traffic jams, the repeated braking with minimal cooling time causes brake components to reach higher temperatures.
This excessive heat can lead to several problems:
- Brake Fade: When brake components overheat, they temporarily lose effectiveness, requiring more pedal pressure to achieve the same stopping power.
- Premature Pad Wear: Heat-stressed brake pads wear down significantly faster, sometimes reducing their lifespan by 50% compared to highway driving.
- Rotor Warping: Intense heat followed by cooling can cause rotors to warp or develop surface irregularities, resulting in pulsation or vibration when braking.
- Brake Fluid Degradation: Extended high temperatures can cause brake fluid to break down, potentially leading to reduced braking performance or even brake failure in extreme cases.
According to a 2024 analysis of service records from urban repair shops, vehicles primarily driven in stop-and-go conditions required brake service approximately twice as often as similar vehicles used mainly for highway driving.
How Stop-and-Go Driving Burns More Fuel and Hurts Engine Efficiency

Traffic congestion doesn't just waste your time, it wastes your fuel as well. The continuous cycle of acceleration and braking is perhaps the least efficient way to operate an internal combustion engine, dramatically increasing fuel consumption compared to steady-state driving.
Modern studies have quantified this effect. Research from the Department of Transportation in 2023 found that vehicles in congested urban traffic consume between 30-40% more fuel than the same vehicles traveling at steady highway speeds. This inefficiency stems from several factors:
First, each acceleration requires a significant energy input from your engine, much of which is then wasted when you brake moments later. This energy-conversion inefficiency is fundamental to stop-and-go driving patterns.
Second, engines operate most efficiently within specific RPM ranges, usually at moderate, steady speeds. The constant fluctuation between idle and acceleration prevents your engine from settling into its efficiency sweet spot.
Even hybrid vehicles, which recapture some energy during braking, experience reduced efficiency in severe stop-and-go conditions. While they fare better than conventional vehicles, the constant cycling between electric and gasoline power still reduces their overall efficiency compared to steady driving.
Beyond the immediate cost of wasted fuel, this inefficient operation increases carbon emissions and contributes to faster engine contamination. As noted in our guide on oil change intervals, engines operating primarily in stop-and-go traffic often require more frequent oil changes to maintain proper protection.
Why Stop-and-Go Driving Puts Extra Strain on Your Suspension System
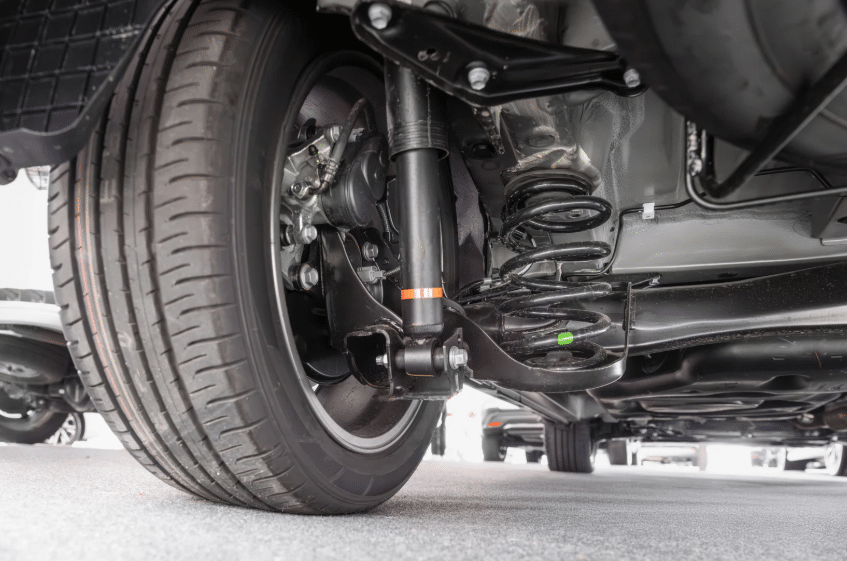
While less obvious than engine or brake wear, your vehicle's suspension system silently absorbs significant stress during stop-and-go driving. The frequent weight transfer that occurs during acceleration and braking creates additional load on suspension components that weren't designed for such constant cycling.
Every time you brake, weight shifts forward, compressing the front suspension. When you accelerate, weight transfers rearward. In normal driving, these weight transfers occur occasionally, but in traffic jams, they happen continuously, sometimes hundreds of times during a single commute.
This repeated compression and extension accelerates wear on:
- Shock Absorbers/Struts: These components control the rate of weight transfer and dampen bouncing. Excessive cycling causes fluid breakdown and internal wear.
- Bushings and Ball Joints: The rubber and plastic components that allow controlled movement degrade faster under constant articulation.
- Control Arm Components: The arms that connect your wheels to the vehicle frame experience increased stress from the repetitive weight shifts.
- Mounts and Bearings: Various connection points throughout the suspension system face accelerated deterioration.
According to a 2024 analysis of urban vehicle maintenance patterns, cars primarily used in stop-and-go traffic required suspension-related repairs up to 40% more frequently than comparable vehicles used mainly for highway driving.
The subtle degradation of suspension components not only affects ride comfort but can impact safety by reducing vehicle stability during emergency maneuvers and extending stopping distances. Regular inspection of these components is especially important for vehicles frequently subjected to congested driving conditions.
Preventive Maintenance Tips for Traffic-Stressed Vehicles
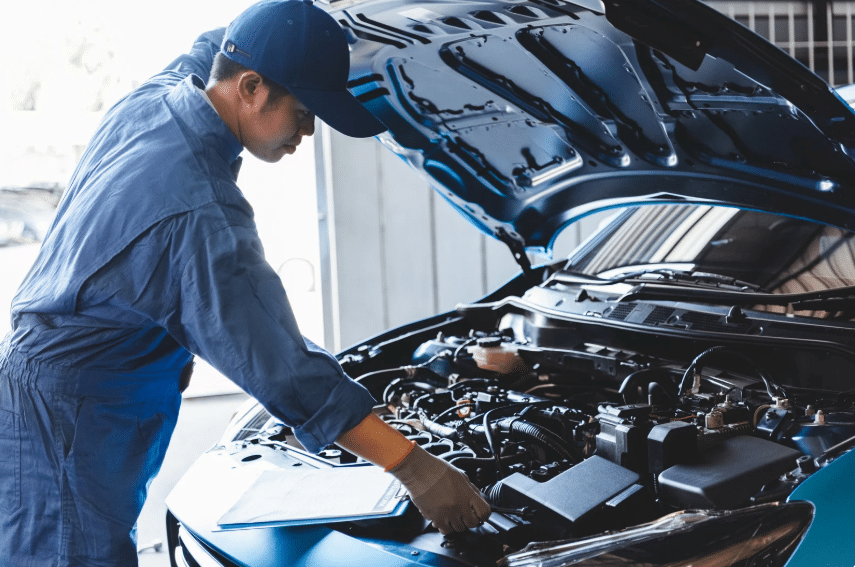
Given the accelerated wear that stop-and-go traffic causes, vehicles regularly subjected to congested driving conditions benefit from a more proactive maintenance approach. These targeted maintenance strategies can significantly extend the life of critical components and help avoid costly repairs.
Engine Protection Strategies
For engines stressed by traffic conditions, consider these maintenance adjustments:
- Shortened Oil Change Intervals: Consider changing your oil every 3,000-5,000 miles rather than the manufacturer's maximum recommendation if your driving is predominantly in congested areas.
- Premium Synthetic Oils: These provide better protection under the thermal cycling common in stop-and-go driving.
- Fuel System Cleaners: Using quality fuel injector cleaners every 5,000-7,000 miles can help reduce carbon buildup from incomplete combustion.
- Air Filter Monitoring: Traffic congestion often occurs in areas with higher particulate pollution, potentially clogging air filters more quickly.
Transmission Care
To protect your transmission from the stresses of stop-and-go driving:
- More Frequent Fluid Checks: Inspect transmission fluid levels and condition monthly if you're regularly stuck in traffic.
- Transmission Fluid Changes: Consider servicing at 30,000-40,000 miles rather than the maximum 60,000-100,000 miles recommended for ideal conditions.
- Cooling System Maintenance: Ensure your radiator and transmission cooler (if equipped) are clean and functioning properly to manage the increased heat.
Brake System Maintenance
For vehicles regularly subjected to traffic conditions:
- Brake Inspections: Have your brake pads, rotors, and fluid inspected every 10,000 miles rather than waiting for warning signs.
- Brake Fluid Flushes: Consider changing brake fluid every 2 years instead of the typical 3-5 year recommendation to prevent moisture accumulation and fluid degradation.
- Premium Brake Components: When replacement is necessary, consider upgrading to higher-quality brake pads designed to withstand higher temperatures.
Preparing your car properly for service visits can help technicians more effectively address these traffic-related issues and provide more accurate recommendations for your specific driving conditions.
Driving Techniques to Minimize Vehicle Stress

While you can't avoid traffic entirely, you can adopt driving techniques that significantly reduce its impact on your vehicle. These approaches not only extend component life but also often improve fuel economy and reduce driver stress as well.
The Spacing Technique
Rather than accelerating quickly to close gaps and then braking hard, maintain a larger buffer between you and the vehicle ahead. This allows you to:
- Drive at a more consistent average speed
- Reduce the frequency and intensity of braking
- Minimize transmission shifting
- Improve fuel economy by up to 20% in congested conditions
Studies show that maintaining a 3-4 second gap (rather than the minimum safe 2-second distance) can dramatically reduce the frequency of braking events in traffic.
Gentle Acceleration
When traffic begins moving, resist the urge to accelerate quickly. Instead:
- Apply gentle, progressive throttle
- Allow the engine to build RPMs gradually
- Reduce transmission strain through smoother engagement
- Minimize weight transfer stress on suspension components
This technique is particularly beneficial for automatic transmissions, as it allows for smoother gear changes and reduces clutch friction.
Engine Braking
Before applying your brakes, consider:
- Removing your foot from the accelerator earlier
- Allowing natural engine compression to slow the vehicle
- Using downshifting (in manual transmissions) judiciously
- Reducing brake pad and rotor temperatures
This technique not only extends brake life but can improve fuel economy by avoiding the need to accelerate back to speed from a complete stop.
Understanding why stop-and-go driving is particularly hard on your vehicle can provide additional motivation to implement these driving techniques consistently.
Frequently Asked Questions
How much faster does stop-and-go traffic wear out my brakes?
Vehicles primarily driven in congested conditions typically require brake service 50-100% more frequently than those used mainly for highway driving. The constant friction generates excessive heat that accelerates pad wear and can lead to rotor warping. Most urban commuters will need brake pad replacement every 20,000-30,000 miles compared to 40,000-60,000 miles for highway drivers.
Does stop-and-go traffic affect electric vehicles differently than gas vehicles?
Yes, electric vehicles generally fare better in stop-and-go traffic due to regenerative braking that recaptures energy while slowing down. This reduces physical brake wear and improves efficiency in congested conditions. However, EVs still experience increased stress on suspension components and can see reduced range in severe traffic compared to steady-speed driving.
How often should I change my transmission fluid if I primarily drive in heavy traffic?
For vehicles regularly subjected to stop-and-go conditions, transmission fluid should typically be changed every 30,000-40,000 miles rather than the manufacturer's maximum interval (which can be up to 100,000 miles). The frequent shifting and higher operating temperatures in traffic accelerate fluid breakdown, reducing its protective properties more quickly.
Can using cruise control in slow-moving traffic help reduce vehicle wear?
Adaptive cruise control systems in newer vehicles can help reduce vehicle wear in slow traffic by maintaining more consistent speeds and smoother acceleration/deceleration cycles than human drivers typically achieve. However, standard cruise control should never be used in unpredictable stop-and-go conditions as it can't respond appropriately to changing traffic flow.
Is there a specific engine oil that's better for stop-and-go driving conditions?
Full synthetic oils generally provide superior protection for engines regularly operated in stop-and-go traffic. They maintain better viscosity at both high and low temperatures, resist breakdown from the frequent temperature cycling, and provide improved protection during the numerous cold-start cycles experienced in congested driving. Look for oils specifically labeled for "severe" or "extreme" driving conditions.
Contact Blue Ridge Automotive – European & Domestic for a Custom Maintenance Plan Today
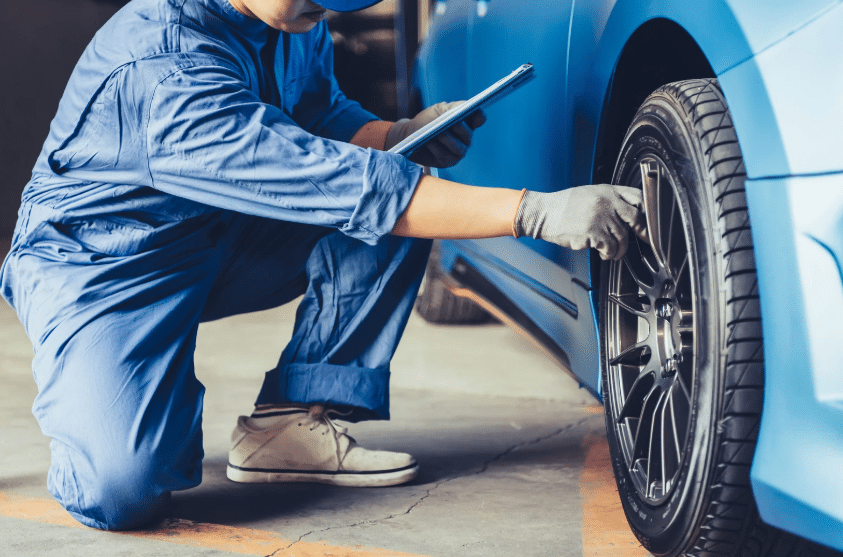
Stop-and-go traffic does more than test your patience, it quietly wears down your engine, transmission, brakes, and suspension. Over time, this can lead to reduced fuel economy, higher repair costs, and a shorter vehicle lifespan. But with the right maintenance and driving habits, you can fight back against the damage of daily congestion.
At Blue Ridge Automotive – European & Domestic, we specialize in keeping your vehicle running strong through the toughest urban conditions. Our ASE-certified technicians understand the wear traffic causes and offer tailored maintenance plans, premium components, and expert inspections designed to counteract that strain. We also help you adopt smarter driving techniques to reduce long-term damage and improve performance.Don’t let traffic take a toll on your car. Contact Blue Ridge Automotive – European & Domestic today to schedule a comprehensive assessment and get a maintenance plan built for your driving routine.
When your vehicle's performance starts to lag, the culprit might be hiding under the hood in the form of a struggling turbocharger. These powerful components, which can increase engine efficiency by up to 30%, require specific maintenance to function properly throughout their lifespan.
Whether you're noticing decreased acceleration, unusual whistling sounds, or excessive exhaust smoke, understanding how to maintain and troubleshoot your turbocharger can save you thousands in repair costs. At Blue Ridge Auto, we've seen firsthand how proper turbocharger maintenance can extend engine life and maintain vehicle performance.
This comprehensive guide will walk you through everything from basic maintenance schedules to advanced troubleshooting techniques, helping you keep your turbocharged vehicle running at peak performance for years to come.
How Turbochargers Boost Engine Power and Fuel Efficiency
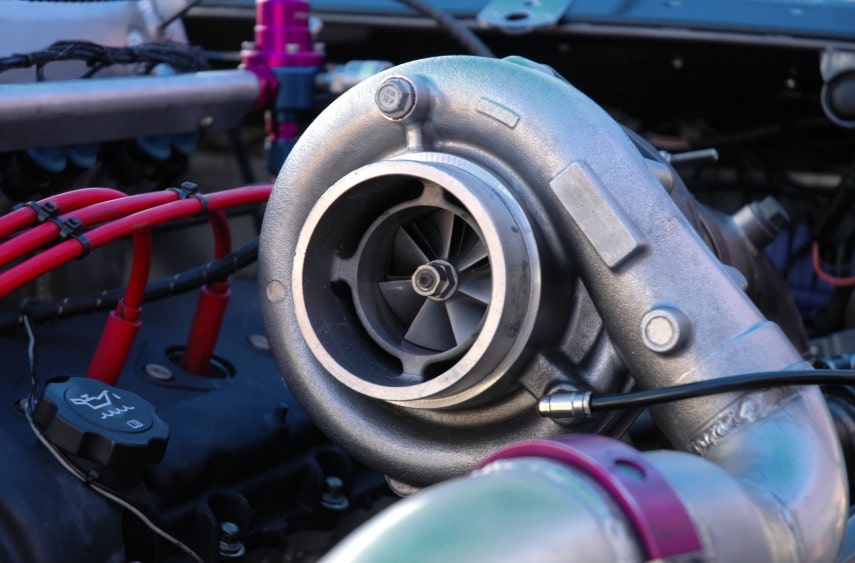
A turbocharger is essentially an air compressor that increases the power output of an engine by forcing extra air into the combustion chamber. This seemingly simple device consists of several critical components working in harmony: the turbine wheel, compressor wheel, center housing, bearings, and wastegate.
The turbine wheel captures energy from the exhaust gases, which then spins the compressor wheel through a connecting shaft. This process forces more air into the engine's cylinders, allowing more fuel to be burned and creating more power from each explosion in the combustion chamber. Modern vehicles often use variable geometry turbochargers that can adjust their output based on driving conditions.
According to industry statistics from 2024, over 60% of new vehicles now come equipped with turbochargers, up from just 35% in 2018. This significant increase demonstrates manufacturers' commitment to balancing performance with fuel efficiency requirements.
Understanding how your specific turbocharger operates is crucial for proper maintenance. Most passenger vehicles use single turbochargers, while performance and diesel vehicles might utilize twin or sequential turbocharger setups for optimized power delivery across different RPM ranges.
Maintenance Habits That Prevent Turbocharger Failure
Regular maintenance is your first line of defense against turbocharger failure. Following these proven practices can significantly extend your turbocharger's operational life:
Oil Quality and Change Intervals
Your turbocharger's bearings spin at incredible speeds, often exceeding 150,000 RPM. This creates extreme heat and stress that only proper lubrication can manage. Always:
- Use manufacturer-recommended synthetic oils designed for turbocharged engines
- Follow strict oil change intervals (typically every 5,000 miles or less for turbocharged vehicles)
- Check oil levels weekly, as turbochargers consume oil faster than naturally aspirated engines
Oil contamination is particularly damaging to turbochargers. Even small metal particles can score bearing surfaces, creating a cascade of damage. At Blue Ridge Auto, we recommend using high-quality oil filters specifically designed for turbocharged applications and never extending oil change intervals beyond manufacturer specifications.
Proper Warm-up and Cool-down Procedures
One of the most common causes of premature turbocharger failure is improper operating procedures. Before driving aggressively, allow your engine to reach normal operating temperature, typically 2-3 minutes of idle time. This ensures oil properly circulates through the turbocharger bearings.
Equally important is the cool-down period. After highway driving or any situation where the turbocharger has been working hard, allow the engine to idle for 30-60 seconds before shutting it off. This prevents oil from "coking" (burning) inside the turbocharger when heat builds up without circulation.
These simple habits can add years to your turbocharger's operational life and prevent the formation of carbon deposits that restrict turbocharger movement.
Identify and Fix the Most Frequent Turbocharger Issues
Turbochargers typically show specific symptoms when they begin to fail. Recognizing these early warning signs can prevent catastrophic damage to both the turbocharger and engine. Our diagnostic experts at Blue Ridge Auto have compiled this troubleshooting guide based on thousands of turbocharger inspections.
Lack of Power and Poor Acceleration
When your vehicle feels sluggish despite pressing the accelerator, your turbocharger may not be providing the expected boost. Common causes include:
- Boost leaks from cracked or disconnected hoses
- Clogged air filters that are restricting airflow
- Carbon buildup on the compressor or turbine wheels
- Wastegate issues that are preventing proper boost regulation
The solution typically involves a thorough inspection of the entire intake and exhaust system. Pressure testing can identify leaks that might be invisible to the naked eye. In many cases, simply replacing worn hoses and clamps can restore proper boost pressure and performance.
Modern vehicles store boost-related fault codes that can be retrieved through diagnostic scanning. Advanced diagnostic tools like those used in our evolution of car diagnostic services can pinpoint specific components that require attention.
Unusual Noises: Whistling, Whining, or Rattling
Turbochargers produce a distinctive sound during normal operation, but certain noises indicate developing problems:
A high-pitched whistle often indicates an exhaust leak before the turbocharger or a crack in the turbocharger housing. Grinding or rattling suggests internal damage to the turbine or compressor wheels, potentially from foreign object damage or bearing failure.
The most concerning sound is a loud whining that increases with engine RPM, which typically indicates bearing wear. This requires immediate attention as complete bearing failure can send metal fragments into your engine, causing extensive damage.
Diagnosing turbocharger noises requires specialized equipment and experience. A mechanic with turbocharger expertise can use a mechanic's stethoscope and other diagnostic tools to isolate the exact source of unusual sounds.
Excessive Smoke from the Exhaust
Our technicians have developed specialized smoke analysis protocols that help identify the exact cause of exhaust issues in turbocharged vehicles. The following color and timing of exhaust smoke provide valuable diagnostic information:
- Blue Smoke: Typically indicates oil consumption issues, often caused by worn turbocharger seals allowing oil to enter the combustion chamber. This commonly occurs during acceleration when boost pressure overcomes the resistance of weakened seals.
- Black Smoke: Suggests incomplete fuel combustion, potentially from a turbocharger delivering inconsistent air pressure or a wastegate that's failing to regulate boost properly.
- White Smoke: If they persist after warm-up, they might indicate coolant entering the combustion chamber through cracked turbocharger components, a serious condition requiring immediate repair.
High-Tech Diagnostic Methods for Accurate Turbocharger Troubleshooting
When basic troubleshooting doesn't resolve performance issues, modern diagnostic techniques can provide deeper insights. The evolution of car diagnostic services has made turbocharger assessment significantly more precise.
Boost Pressure Testing
Measuring actual boost pressure against manufacturer specifications is fundamental to turbocharger diagnosis. This test involves connecting a pressure gauge to the intake system while monitoring engine performance under load conditions.
In 2025, most professional shops use digital pressure transducers that can record boost patterns throughout the RPM range, creating visual representations of turbocharger performance. Normal boost patterns show smooth pressure increases that plateau at the manufacturer's specified limit.
Erratic readings often point to wastegate issues, while consistently low readings suggest internal turbocharger problems or system leaks. Modern vehicles typically target between 8-15 PSI of boost for standard applications, while performance models might generate 20+ PSI.
Shaft Play Measurement
Excessive shaft movement in any direction indicates bearing wear. Professional mechanics use dial indicators to measure shaft movement with the turbocharger removed from the vehicle.
Manufacturer specifications typically allow for 0.002-0.004 inches of movement. Anything more suggests bearing deterioration. This precise measurement requires specialized tools and training but provides definitive evidence of internal turbocharger condition before disassembly.
Know When to Rebuild or Replace a Failing Turbocharger
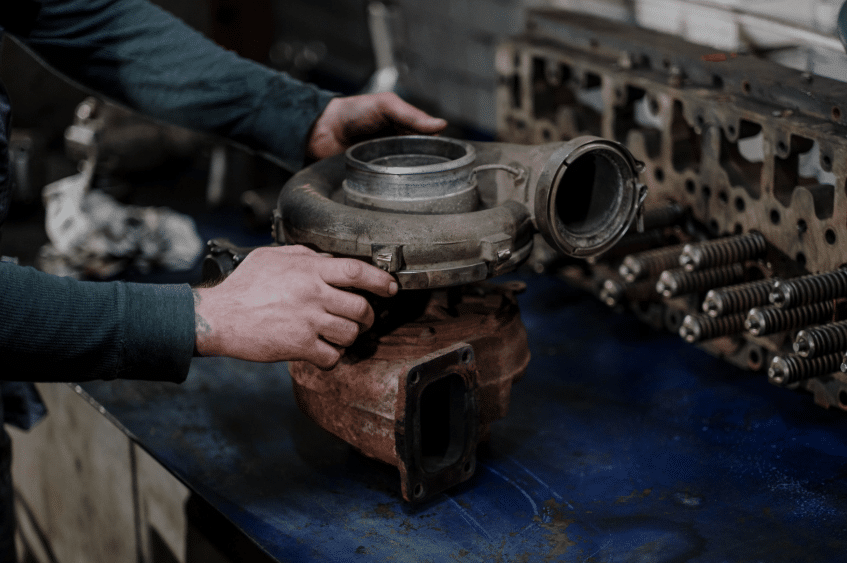
The eternal question facing owners of turbocharged vehicles is whether to rebuild or replace a failing unit. Several factors influence this decision:
Vehicle Age and Value
For vehicles under 5 years old with less than 60,000 miles, replacement with a new OEM turbocharger typically makes the most sense. The reliability and warranty protection justify the higher cost, especially for vehicles you plan to keep long-term.
For older vehicles or those with higher mileage, remanufactured turbochargers offer an excellent balance of quality and value. These units have been completely disassembled, inspected, and rebuilt with new components to meet strict specifications.
Extent of Damage
Minor issues like worn wastegates, stuck variable vanes, or external leaks can often be repaired without complete turbocharger replacement. However, significant bearing wear, shaft damage, or wheel damage typically necessitates replacement of the entire unit.
Modern turbochargers integrate closely with engine management systems, making proper calibration essential. When replacing turbochargers on vehicles built after 2020, ECU adaptation procedures must be performed to ensure optimal performance and prevent error codes.
A Practical Maintenance Timeline to Extend Turbocharger Life
Creating a maintenance schedule specific to turbocharged vehicles can prevent the most common failures. Based on data from our service department at Blue Ridge Auto, we recommend:
Every 5,000 Miles or 6 Months:
- Change oil and filter using turbo-specific synthetic oil
- Inspect the intercooler and associated hoses for leaks
- Check the air filter condition and replace if dirty
- Examine the turbo oil feed and return lines for leaks or restrictions
Every 15,000 Miles or 18 Months:
- Replace the air filter regardless of apparent condition
- Perform boost pressure testing to verify proper operation
- Clean the mass airflow sensor and throttle body
- Inspect the wastegate actuator operation
Every 30,000 Miles or 36 Months:
- Replace all turbocharger-related hoses and gaskets preventatively
- Perform compression testing to ensure engine health
- Clean or replace the intercooler if performance has degraded
- Check for exhaust leaks that could affect turbocharger performance
Following this schedule can extend turbocharger life by 40-60% compared to vehicles maintained on standard intervals, according to our workshop data compiled from 2020-2025.
Real-World Results: How Preventative Care Saved a Turbocharged SUV
In 2024, a customer brought their 2019 turbocharged SUV to our shop with 78,000 miles, reporting occasional power loss and a check engine light. Initial diagnostics revealed borderline low boost pressure and early signs of oil contamination affecting turbocharger performance.
Rather than waiting for complete failure, we recommended our preventative maintenance package, which included:
- Complete oil system flush with specialized cleaners
- Replacement of oil feed and return lines that showed signs of restriction
- Turbocharger inspection and cleaning without removal
- Installation of an upgraded oil filter with better filtration capabilities
The total investment was approximately $650, compared to the $2,800 that a complete turbocharger replacement would have cost. One year and 15,000 miles later, the vehicle continues to perform flawlessly with proper boost pressure and no warning lights.
This case demonstrates how early intervention based on subtle symptoms can prevent major repairs and extend component life significantly.
Frequently Asked Questions
How long should a turbocharger last in a modern vehicle?
With proper maintenance, a modern turbocharger should last between 100,000 to 150,000 miles. However, this varies significantly based on driving habits, maintenance practices, and vehicle design. Vehicles primarily driven on highways typically see longer turbocharger life than those used for frequent short trips or stop-and-go driving.
Premature failures most commonly stem from oil-related issues rather than mechanical defects in the turbocharger itself. Regular oil changes with the correct specification of synthetic oil can often double the service life of these sophisticated components.
What's the average cost to replace a turbocharger?
Turbocharger replacement costs vary widely based on vehicle make and model. For mainstream vehicles, expect to pay between $1,500 and $3,500 for a complete replacement, including parts and labor. Luxury and performance vehicles can cost substantially more, often ranging from $3,000 to $6,000 due to more complex systems and more expensive components.
Remanufactured units typically reduce costs by 30-40% while still providing excellent reliability. Labor represents approximately 40-50% of the total cost due to the complex removal and installation process that often requires removing multiple components for access.
Can I drive with a failing turbocharger?
While technically possible, driving with a failing turbocharger is strongly discouraged. Early symptoms like reduced power or unusual noises might seem minor, but continued operation can lead to catastrophic failure where turbocharger fragments enter the engine, causing extensive damage.
Additionally, a failing turbocharger often leaks oil, which can be drawn into the intake system and cause hydrolock, a serious condition that can bend engine components. At minimum, operating with a failing turbocharger increases fuel consumption and emissions while decreasing performance.
When symptoms appear, limiting driving to necessary trips at reduced speed until repairs can be completed is the safest approach.
Is it normal for a turbocharged engine to consume more oil?
Some oil consumption is normal in turbocharged engines, typically between a quart every 3,000-5,000 miles. This consumption occurs because turbochargers use engine oil for both lubrication and cooling, operating at extremely high temperatures that can cause some oil vaporization.
However, consumption exceeding a quart every 1,000 miles indicates a potential problem that should be investigated. Modern turbocharged engines (built after 2018) have improved seal designs that significantly reduce oil consumption compared to earlier generations. Regular monitoring of oil levels is essential for turbocharged vehicles, with checks recommended at least every second fuel fill-up.
Can aftermarket performance modifications damage my turbocharger?
Aftermarket modifications that increase boost pressure without supporting upgrades can significantly reduce turbocharger lifespan. Simple "tune" modifications that increase boost by 2-3 PSI typically remain within safety margins, but more aggressive tuning without upgrading cooling systems, fuel delivery, and potentially the turbocharger itself creates substantial risk.
Industry data shows that turbochargers on modified vehicles without supporting upgrades fail at approximately twice the rate of stock configurations. If you're considering performance modifications, a comprehensive approach that addresses all affected systems is essential for reliability.
Some manufacturers now use tamper detection systems that can identify unauthorized modifications and potentially affect warranty coverage.
Extend Turbocharger Life and Avoid Major Repairs with Smart Maintenance
Proper turbocharger maintenance is not just about avoiding expensive repairs, it's about maintaining vehicle performance, efficiency, and reliability. By understanding how your turbocharger functions, recognizing early warning signs of trouble, and following a comprehensive maintenance schedule, you can enjoy the performance benefits of turbocharging without unexpected breakdowns.
Remember that professional diagnostic equipment and experience make a significant difference when addressing turbocharger issues. If you're experiencing any symptoms mentioned in this guide, we encourage you to seek a thorough evaluation before minor issues develop into major repairs. Your turbocharged vehicle represents a significant investment; protecting that investment with proper care simply makes good sense.
Contact Blue Ridge Automotive – European & Domestic to Maximize Vehicle Reliability and Efficiency
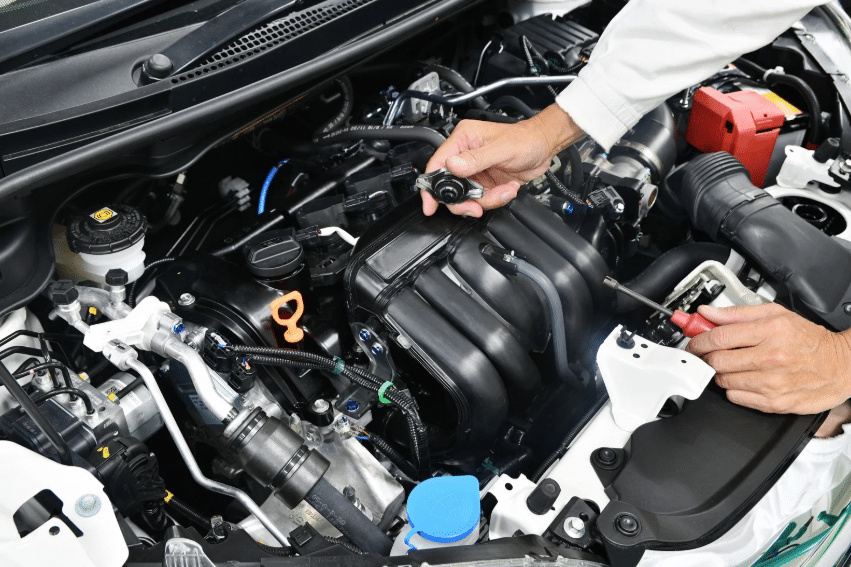
We specialize in digital solutions tailored to your auto repair business. With decades of experience and a skilled team, Blue Ridge Auto helps clients elevate performance and meet measurable goals through reliable and efficient service delivery.Contact Blue Ridge Auto to schedule a consultation and discover how our team can support your vehicle’s long-term reliability with precision diagnostics and repair solutions.
Modern vehicles are smarter, safer, and more advanced than ever before, thanks in large part to Advanced Driver Assistance Systems (ADAS). These technologies, including lane departure warnings, blind spot monitoring, and automatic emergency braking, help reduce human error and enhance safety. However, these advanced features depend heavily on the precision of sensors and cameras—many of which are mounted directly on the windshield.
When your windshield is repaired or replaced, the position and alignment of those components can shift, even slightly. That’s where ADAS calibration becomes essential. Without recalibration, those systems may no longer function correctly, putting you and others at risk on the road.
If you're unsure whether calibration is truly necessary or just an added service, this guide breaks down what you need to know. We’ll walk through the importance of calibration, frequently asked questions, and expert insight into how to ensure your system works properly after any windshield service.
What Is ADAS Calibration?
ADAS calibration is the process of realigning the cameras, sensors, and radar systems that control your vehicle’s safety features. These components are programmed to operate within extremely tight tolerances, often within fractions of a degree or millimeter.
Common features that rely on properly calibrated systems include:
- Adaptive cruise control – Maintains a safe distance from the vehicle ahead
- Lane keep assist – Helps steer the car within its lane
- Forward collision warning – Alerts the driver if a crash is imminent
- Automatic emergency braking – Engages brakes when a collision is unavoidable
- Blind spot monitoring – Alerts you to vehicles in adjacent lanes
Even minor misalignments can disrupt these systems, causing them to behave unpredictably. For instance, a miscalibrated camera may delay braking or trigger false warnings, which can create dangerous driving conditions.
Why Does Windshield Replacement Affect ADAS?
Most people think of the windshield as a protective barrier from wind, debris, and weather. While that’s true, it also serves as a structural anchor point for many ADAS components. Cameras and sensors are often mounted to the interior or exterior of the windshield, positioned in specific locations to provide accurate visual or radar-based input to your vehicle’s control systems.
When a windshield is replaced, even the most careful installation can result in slight deviations in position. These changes are invisible to the naked eye but significant enough to affect the readings of your ADAS. Without recalibration, the system may receive inaccurate data about your surroundings—leading to compromised decision-making by your vehicle’s safety systems.
It’s not just replacement that matters. Even chip repairs or resealing services can impact the alignment of the attached equipment. That’s why calibration should always be considered any time windshield work is performed.
Five Key Facts About ADAS Calibration

1. Every Windshield Service Requires Recalibration
Regardless of how small the job seems, any disruption to the windshield can affect sensor alignment. A chip repair may appear insignificant, but the heat and pressure used in repair processes can still shift components slightly. Full windshield replacements almost always alter camera positioning, which directly impacts the ADAS system’s accuracy. Calibration ensures your vehicle's safety features remain reliable and responsive.
2. There Are Two Types of Calibration
Different vehicles require different types of ADAS recalibration:
- Static calibration is performed in a controlled shop environment using manufacturer-specific targets and tools. This process typically involves setting up alignment boards at precise distances from the vehicle to guide the sensors into proper configuration.
- Dynamic calibration requires the vehicle to be driven under specific road conditions and speeds. During this process, the system calibrates itself using live data from the road, traffic, and environment.
Some vehicles require just one method, while others demand both. The correct calibration process depends entirely on your vehicle's make, model, and specific ADAS system requirements.
3. Skipping Calibration Could Void Your Warranty
Most modern vehicle warranties include clauses requiring proper maintenance of ADAS components. If recalibration is skipped after a windshield replacement, and a related safety feature fails, the manufacturer may not cover the repair or resulting damage. Furthermore, skipping this step could also affect your insurance coverage in the event of an accident—especially if a safety system is found to be malfunctioning due to misalignment.
4. Calibration Is Not a DIY Job
Precision is everything in ADAS calibration. Attempting to adjust sensors manually without the proper tools and training can make the situation worse. Professional calibration requires factory-approved software, alignment fixtures, diagnostic equipment, and technicians trained in specific manufacturer procedures. Trying to skip this step or cut corners can result in unreliable safety systems and increased liability.
5. Insurance Often Covers Calibration
Many insurance policies that cover windshield replacement also cover ADAS calibration. Since it’s considered a necessary component of the replacement process, reputable insurance companies view it as a safety-related cost rather than an optional add-on. Still, it’s best to confirm with your insurance provider to understand what’s included in your coverage.
Common FAQs About ADAS Calibration
Q: How long does ADAS calibration take?
A: The time varies depending on your vehicle and the type of calibration. Static calibration typically takes one to two hours, while dynamic calibration may require up to three hours, especially if conditions like clear roads and specific speeds are needed.
Q: What happens if I skip it?
A: Failing to calibrate your ADAS system after windshield service can lead to sensor errors, false warnings, and failure of critical safety systems like automatic braking and lane assist. In worst-case scenarios, it can result in delayed reactions during emergencies and increase the likelihood of collisions.
Q: How do I know if my car needs ADAS calibration?
A: If your vehicle is from 2016 or newer and includes any driver assistance technologies such as lane keep assist, adaptive cruise control, or automatic emergency braking, calibration is required any time the windshield is disturbed.
Q: Can a small chip repair affect ADAS?
A: Yes. Even chip repairs can introduce enough change to throw off camera alignment. Any time glass near the sensor mounting points is altered, it’s best to conduct a calibration check to be safe.
The Real-World Risk of Skipping Calibration

Imagine your car misjudging the distance between you and another vehicle. Your automatic braking system might activate too late, or not at all. A misaligned lane assist system could cause your steering to pull in the wrong direction without warning.
Even a tiny shift in a front-facing camera can cause major safety issues. These systems are designed to respond in real time, based on exact readings of your environment. If calibration is even slightly off, the system may fail to interpret road conditions accurately, leading to dangerous misjudgments when you least expect it.
How to Know If Your ADAS Calibration Was Done Right
After windshield service, it’s natural to assume everything was restored to working order—but how can you really be sure? Here are five signs that your ADAS calibration was properly performed:
- No dashboard warning lights
If your calibration was successful, there should be no persistent ADAS-related warnings on your dash. - All safety features function as expected
Lane keep assist, adaptive cruise, emergency braking, and blind spot detection should all respond appropriately in real-world driving. - The vehicle handles normally
Steering should feel smooth, and there should be no drifting or overcorrection from automated systems.
You receive proper documentation
A trustworthy repair shop will provide proof of calibration and explain the procedures completed. - OEM tools and specs were followed
Ask if the technicians used manufacturer-specific equipment and alignment procedures, not generic tools or guesswork.
Pro tip: Never leave without asking for documentation. A reputable technician will gladly walk you through the process and show you the results of your recalibration.
Ready to Get Started?
If your windshield was recently repaired or replaced, it’s important to ensure your ADAS system is properly calibrated. At Blue Ridge Auto, we use manufacturer-approved tools and expert diagnostics to keep your vehicle’s safety features functioning exactly as they should.
Whether you drive a Toyota, Ford, or BMW, our certified technicians have the experience and tools to calibrate your system with accuracy and care.
Schedule your service appointment today or contact us if you have any questions about ADAS calibration or windshield repair.