DIY Fluid Change Guide for Automatic and Manual Transmissions
Sharing this:
Maintaining your vehicle's transmission is essential for its longevity and performance. While many car owners understand the importance of regular oil changes, transmission fluid often gets overlooked until problems arise. Regular transmission fluid changes can extend your vehicle's life and help avoid costly repairs down the road.
The fluid lubricates, cools, and cleans the transmission components, ensuring smooth gear shifts and optimal performance. At Blue Ridge Automotive – European & Domestic, we recommend transmission fluid changes as part of your regular maintenance schedule, but we also understand that some car enthusiasts prefer handling maintenance tasks themselves.
This guide provides step-by-step instructions for both automatic and manual transmission fluid changes, including the tools you'll need, safety precautions, and tips for ensuring the job is done correctly. Whether you're a seasoned DIY mechanic or trying your hand at car maintenance for the first time, these instructions will help you complete the task with confidence.
Protect Your Transmission by Understanding Fluid Function
Transmission fluid serves several critical functions in your vehicle. For automatic transmissions, the fluid acts as a hydraulic medium to transfer power from the engine to the transmission. In manual transmissions, it primarily serves as a lubricant for the gears and synchronizers.
Over time, transmission fluid breaks down and becomes contaminated with metal particles, friction material, and other debris. This degradation can lead to:
- Rough or delayed shifting
- Transmission overheating
- Premature wear of internal components
- Complete transmission failure in severe cases
Different vehicles require specific types of transmission fluid. Using the wrong type can cause serious damage to your transmission. Always consult your owner's manual or a trusted mechanic to determine the correct fluid for your vehicle.
The frequency of transmission fluid changes varies depending on your driving habits, vehicle make, and model. As a general rule, automatic transmission fluid should be changed every 30,000 to 60,000 miles, while manual transmission fluid typically lasts 30,000 to 90,000 miles. However, if you frequently tow heavy loads or drive in severe conditions, more frequent changes may be necessary.
Gather Essential Tools and Materials Before You Start
Before beginning your transmission fluid change, gather all necessary tools and materials. Proper preparation will ensure the job goes smoothly and safely. Here's what you'll need:
For automatic transmissions:
- Transmission fluid (specific to your vehicle)
- Transmission filter kit (if applicable)
- Transmission pan gasket (if changing the filter)
- Drain pan (minimum 5-quart capacity)
- Jack and jack stands or vehicle ramps
- Socket set and wrenches
- Torque wrench
- Funnel
- Shop rags
- Gloves and safety glasses
For manual transmissions:
- Manual transmission fluid (specific to your vehicle)
- Drain pan
- Socket set and wrenches
- Funnel with a flexible hose attachment
- Shop rags
- Gloves and safety glasses
Additionally, you might need a fluid pump for refilling certain transmissions, particularly those without dipsticks or with fill plugs in tight locations. Some modern vehicles require special tools for accessing the transmission, so research your specific model before starting.
Quality tools make a difference in how smoothly this job goes. If you're unsure about your vehicle's specific requirements, our team at Blue Ridge Automotive – European & Domestic can guide the correct fluid type and quantity for your particular make and model.
Follow These Safety Tips Before You Begin
Safety should always be your primary concern when working on any vehicle maintenance task. Follow these critical safety measures before beginning your transmission fluid change:
Ensure the vehicle is completely cool before starting. Transmission fluid can reach temperatures of 175°F or higher during normal operation and can cause severe burns if touched.
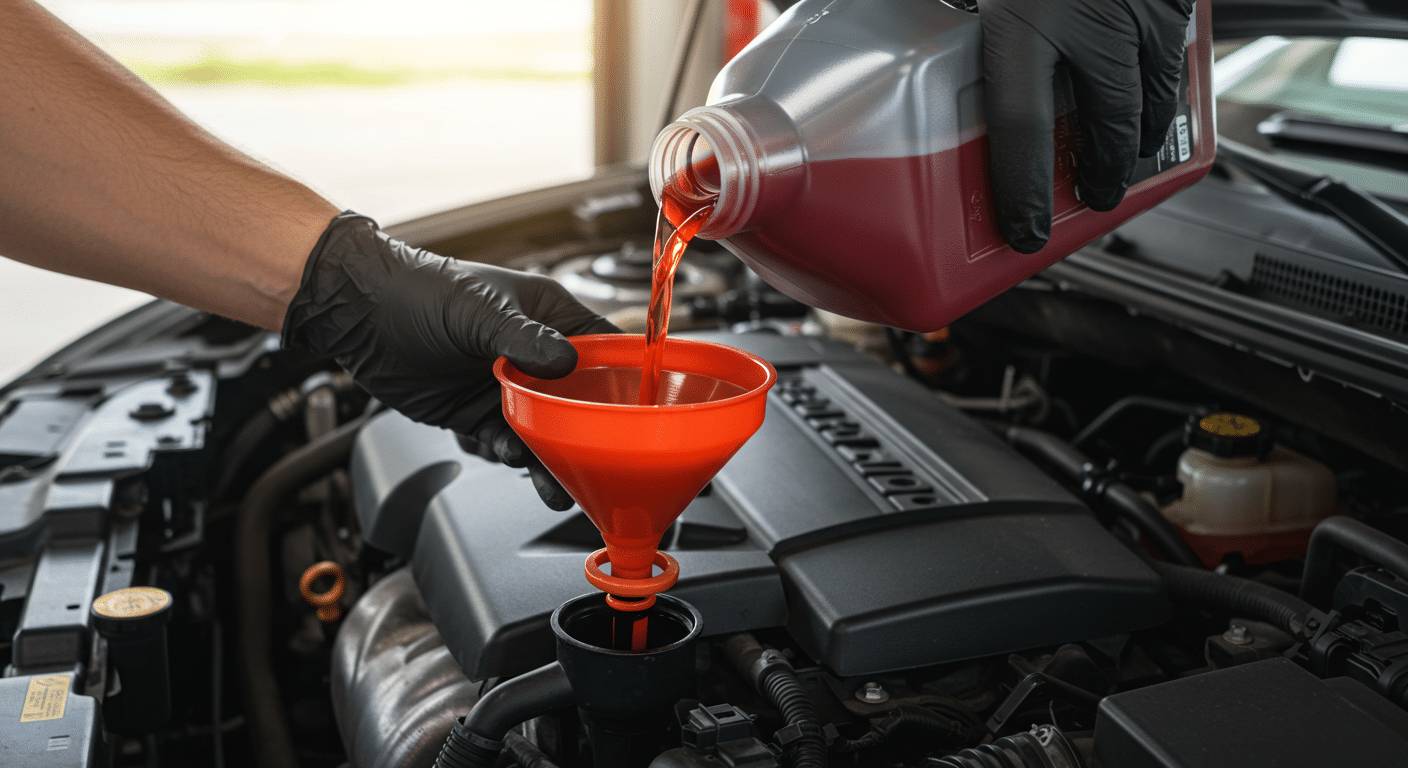
Park on a flat, level surface and engage the parking brake. For additional security, place wheel chocks behind the rear tires if working at the front of the vehicle, or in front of the front tires if working at the rear.
If using a jack, make sure to place jack stands securely under appropriate jacking points. Never rely solely on a hydraulic jack to support your vehicle while working underneath it.
Wear appropriate personal protective equipment, including:
- Safety glasses to protect your eyes from fluid splashes
- Gloves to protect your hands from hot components and chemicals
- Long sleeves to protect your arms from potential burns or cuts
Have a plan for the proper disposal of used transmission fluid. Used automotive fluids are hazardous waste and should never be poured down drains or onto the ground. Most auto parts stores and service centers, including our brake service center, accept used fluids for recycling.
Keep a fire extinguisher nearby as a precaution, and ensure your work area is well-ventilated to avoid breathing in fumes.
Perform a Fluid Change for Automatic Transmissions
Changing the fluid in an automatic transmission involves draining the old fluid, replacing the filter (if applicable), and refilling with fresh fluid. Follow these steps carefully:
Preparation and Draining
- Run the engine until it reaches normal operating temperature, which helps the fluid drain more completely.
- Turn off the engine, then raise and secure the vehicle using ramps or jack stands.
- Locate the transmission pan underneath your vehicle. It's typically rectangular or square-shaped with multiple bolts around its perimeter.
- Position your drain pan beneath the transmission pan.
- Loosen the pan bolts gradually in a cross pattern, leaving a few bolts slightly threaded on opposite sides.
- As you loosen the final bolts, the fluid will begin to seep out. Be careful; the pan may be full of fluid, so maintain pressure against it to control the flow.
- Carefully remove the transmission pan completely, allowing the remaining fluid to drain into your catch pan.
Filter Replacement and Cleaning
- Locate the transmission filter inside the transmission. It's usually attached to the valve body with bolts or clips.
- Remove the old filter and note its orientation for installing the new one.
- Clean the transmission pan thoroughly using solvent or brake cleaner, removing all metal particles and debris.
- Inspect the pan for damage, particularly the gasket sealing surface.
- Install the new filter according to the manufacturer's instructions, ensuring it's properly seated.
- Place the new gasket on the clean pan, using a small amount of gasket sealer at the corners if recommended by your vehicle manufacturer.
Reinstallation and Refilling
- Carefully position the pan with its new gasket against the transmission housing.
- Hand-thread all bolts first, then tighten in a cross pattern to the manufacturer's specifications using a torque wrench.
- Lower the vehicle if necessary to access the fill tube.
- Remove the transmission dipstick and insert a funnel.
- Add the new fluid gradually, checking the level frequently to avoid overfilling.
- Start the engine and let it run for a few minutes with the transmission in Park.
- Shift through all gears with your foot on the brake, then return to Park.
- Check the fluid level again, adding more if necessary.
The exact amount of fluid needed varies by vehicle, but typically ranges from 4 to 16 quarts for a complete change. Consult your owner's manual for the precise specification. Remember that overfilling can be just as harmful as underfilling.
Change Manual Transmission Fluid the Right Way
Manual transmission fluid changes are typically simpler than automatic ones, as they usually don't involve filter replacement. Here's how to perform this maintenance task:
Draining the Old Fluid
- Ensure the vehicle is completely cool before beginning.
- Raise and secure the vehicle using ramps or jack stands.
- Locate both the fill plug and drain plug on the transmission case. The fill plug is typically on the side of the transmission, while the drain plug is at the bottom.
- Remove the fill plug first. This is crucial because if you can't remove the fill plug, you won't be able to refill the transmission after draining.
- Once the fill plug is successfully removed, position your drain pan under the drain plug.
- Remove the drain plug and allow all fluid to drain completely.
- Inspect the drained fluid for metal particles, which could indicate transmission wear.
Refilling with Fresh Fluid
- Clean both the drain and fill plugs, and inspect their sealing washers.
- Replace the drain plug and tighten to the specified torque.
- Using a funnel with a flexible hose attachment, add the new fluid through the fill hole.
- Fill until fluid begins to seep out of the fill hole, which indicates the correct fluid level.
- Replace the fill plug and tighten to the specified torque.
- Lower the vehicle and test drive briefly.
- Check for leaks around both plugs.
Manual transmissions typically require between 2 and 4 quarts of fluid, depending on the vehicle. The exact type of fluid varies significantly between makes and models, with some requiring conventional gear oil while others need specialized synchronizer-friendly fluids.
For high-performance vehicles or those with specialized components like those discussed in our turbocharger maintenance guide, specific transmission fluids may be required.
Adapt Your Approach Based on Vehicle Type
Different vehicles have unique transmission designs that may require special procedures during fluid changes. Here are some special considerations to keep in mind:
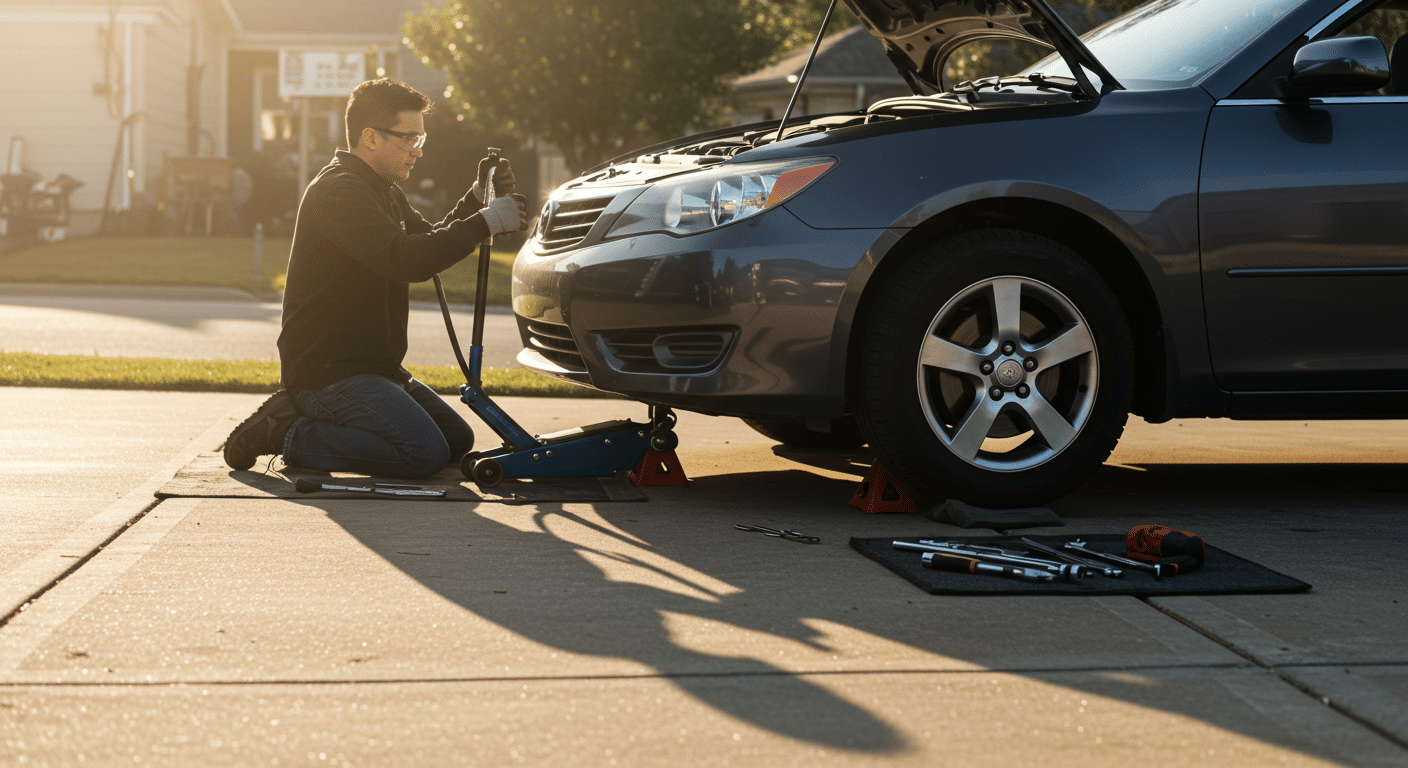
European Vehicles
Many European vehicles, particularly German brands like BMW, Mercedes-Benz, and Volkswagen, claim to have "lifetime" transmission fluid. However, most independent mechanics recommend changing this fluid every 60,000-80,000 miles. These vehicles often require specialized fluids and may need a professional-grade scanner to complete the procedure properly.
CVT Transmissions
Continuously Variable Transmissions (CVTs) are becoming increasingly common in newer vehicles. These transmissions have unique fluid requirements and often need special procedures for fluid changes. Using incorrect fluid in a CVT can cause catastrophic failure. Some CVTs also require a specific procedure to set the correct fluid level, which may involve checking the temperature with a scanner.
Hybrid Vehicles
Hybrid vehicles typically use specialized transmission fluid and may have unique draining and filling procedures. The high-voltage components in hybrid transmissions make these fluid changes particularly dangerous for DIYers without proper training. Consider consulting a professional for these vehicles.
4WD and AWD Vehicles
Four-wheel drive and all-wheel drive vehicles often have additional components like transfer cases and differentials that require their fluid changes. While performing your transmission fluid change, it's a good opportunity to check and service these components as well.
When in doubt about your specific vehicle's requirements, consult your owner's manual or reach out to a professional technician at Blue Ridge Automotive – European & Domestic for guidance.
Solve Common Problems During Fluid Changes
Even with careful preparation, you might encounter some challenges during a DIY transmission fluid change. Here are solutions to common problems:
If the transmission pan bolts are stuck or stripped, try using penetrating oil and allowing it to soak before attempting removal again. For stripped bolts, a bolt extractor set may be necessary.
For overfilled transmissions, use a fluid transfer pump or a turkey baster to remove excess fluid until the level is correct. An overfilled transmission can cause foaming, pressure buildup, and seal damage.
If you notice metal particles or debris in your old fluid, this could indicate internal transmission wear. Small amounts of metal dust are normal, but large chunks or excessive debris warrant professional inspection before continuing to drive the vehicle.
Should you encounter leaks after completing the fluid change, first check that all plugs and bolts are tightened to specification. If leaking persists, the gasket may need replacement, or there could be an issue with the sealing surface.
For vehicles with no visible dipstick (common in newer models), the fluid level must be checked and filled through a special plug on the transmission case. This often requires the vehicle to be level and the fluid at a specific temperature, usually requiring a scanner to verify.
Know When to Bring in a Transmission Specialist
While changing transmission fluid is a manageable DIY project for many car enthusiasts, certain situations call for professional assistance. Consider consulting a professional mechanic at Blue Ridge Automotive – European & Domestic if:
- Your vehicle has a sealed transmission advertised as "fill-for-life"
- You need to perform a complete transmission flush rather than a simple fluid change
- The manufacturer specifies a complex procedure requiring specialized equipment
- Your transmission is exhibiting symptoms like slipping, harsh shifts, or unusual noises
- You've discovered significant metal particles or debris in your old transmission fluid
- Your vehicle has a CVT or hybrid transmission system
- You're uncomfortable working with any aspect of the procedure
Professional transmission services often include comprehensive diagnostics that can identify potential issues before they become major problems. If you're uncertain about taking on this maintenance task yourself, check out our blog for more automotive maintenance tips or contact our service department for assistance.
Frequently Asked Questions
How often should I change my transmission fluid?
For automatic transmissions, most manufacturers recommend changing the fluid every 30,000 to 60,000 miles. Manual transmissions typically require fluid changes every 30,000 to 90,000 miles.
However, if you frequently tow heavy loads, drive in mountainous terrain, or experience stop-and-go traffic regularly, consider more frequent changes. Always check your owner's manual for the manufacturer's specific recommendations for your vehicle.
Is it true that changing transmission fluid in older vehicles can cause problems?
There's a common belief that changing transmission fluid in high-mileage vehicles can cause transmission failure. While it's true that in some cases an older transmission might begin slipping after a fluid change, this typically indicates the transmission was already failing.
The fresh fluid has different friction characteristics than the old, contaminated fluid, which can reveal pre-existing issues. If your vehicle has over 100,000 miles and has never had a transmission fluid change, consider consulting with a professional mechanic first.
What's the difference between a transmission fluid change and a transmission flush?
A transmission fluid change involves draining the fluid that sits in the pan (typically 40-50% of the total fluid) and replacing it with fresh fluid. A transmission flush uses specialized equipment to force out virtually all the old fluid from the transmission, including fluid in the torque converter and transmission cooler lines.
While a flush is more comprehensive, a simple fluid change is adequate for regular maintenance and can be performed at home, whereas a flush typically requires professional equipment.
How do I know if my transmission fluid needs changing if there's no dipstick?
Many modern vehicles have sealed transmissions without traditional dipsticks. For these vehicles, check the owner's manual for the recommended service interval. Some signs that indicate your fluid needs are changing include rough shifting, delayed engagement when putting the vehicle in gear, or unusual noises from the transmission.
These vehicles typically have a fill plug on the transmission case that requires special tools to access, and often need the fluid to be at a specific temperature when checking the level.
Can I mix different brands or types of transmission fluid?
It's not recommended to mix different brands or types of transmission fluid unless they specifically meet the same manufacturer specifications. Transmission fluids have unique friction modifiers and additives designed for specific transmissions.
Mixing incompatible fluids can cause shifting problems, accelerated wear, or even transmission failure. Always use the exact type of fluid specified in your owner's manual or by the transmission manufacturer.
Contact Blue Ridge Automotive – European & Domestic for Trusted Transmission Service
Regular transmission fluid changes are a crucial aspect of vehicle maintenance that can significantly extend the life of your transmission and save you thousands in potential repair costs. While the process may seem intimidating at first, with the right tools, preparation, and guidance, many car owners can successfully perform this maintenance task themselves.
Remember to always use the correct fluid for your specific vehicle, follow safety precautions, and consult your owner's manual for manufacturer-specific instructions. If you encounter any complications or feel uncomfortable with the process, contact Blue Ridge Automotive – European & Domestic for reliable help with your transmission service needs.
About Blue Ridge Automotive – European & Domestic
Blue Ridge Automotive – European & Domestic provides dependable vehicle maintenance and repair solutions built around precision, quality, and care. Our experienced team understands the technical details that matter most for reliable performance, including fluid services for all types of transmissions.
We take pride in offering hands-on expertise and trusted guidance for drivers looking to keep their vehicles running at their best. Contact us to schedule your next service or get answers to your transmission questions.